 authentik SCIM Provisioning
Available on: Enterprise Edition>= 0.18.0
Sync Users and Groups from authentik to Kestra using SCIM.
Prerequisites
- authentik Account: an account with administrative privileges to configure SCIM provisioning.
- Enable multi-tenancy in Kestra: tenants MUST be enabled in Kestra to support SCIM provisioning. You can enable tenants by setting the
kestra.ee.tenants.enabledconfiguration property totrue:
kestra:
  ee:
    tenants:
      enabled: true
Kestra SCIM Setup: Create a New Provisioning Integration
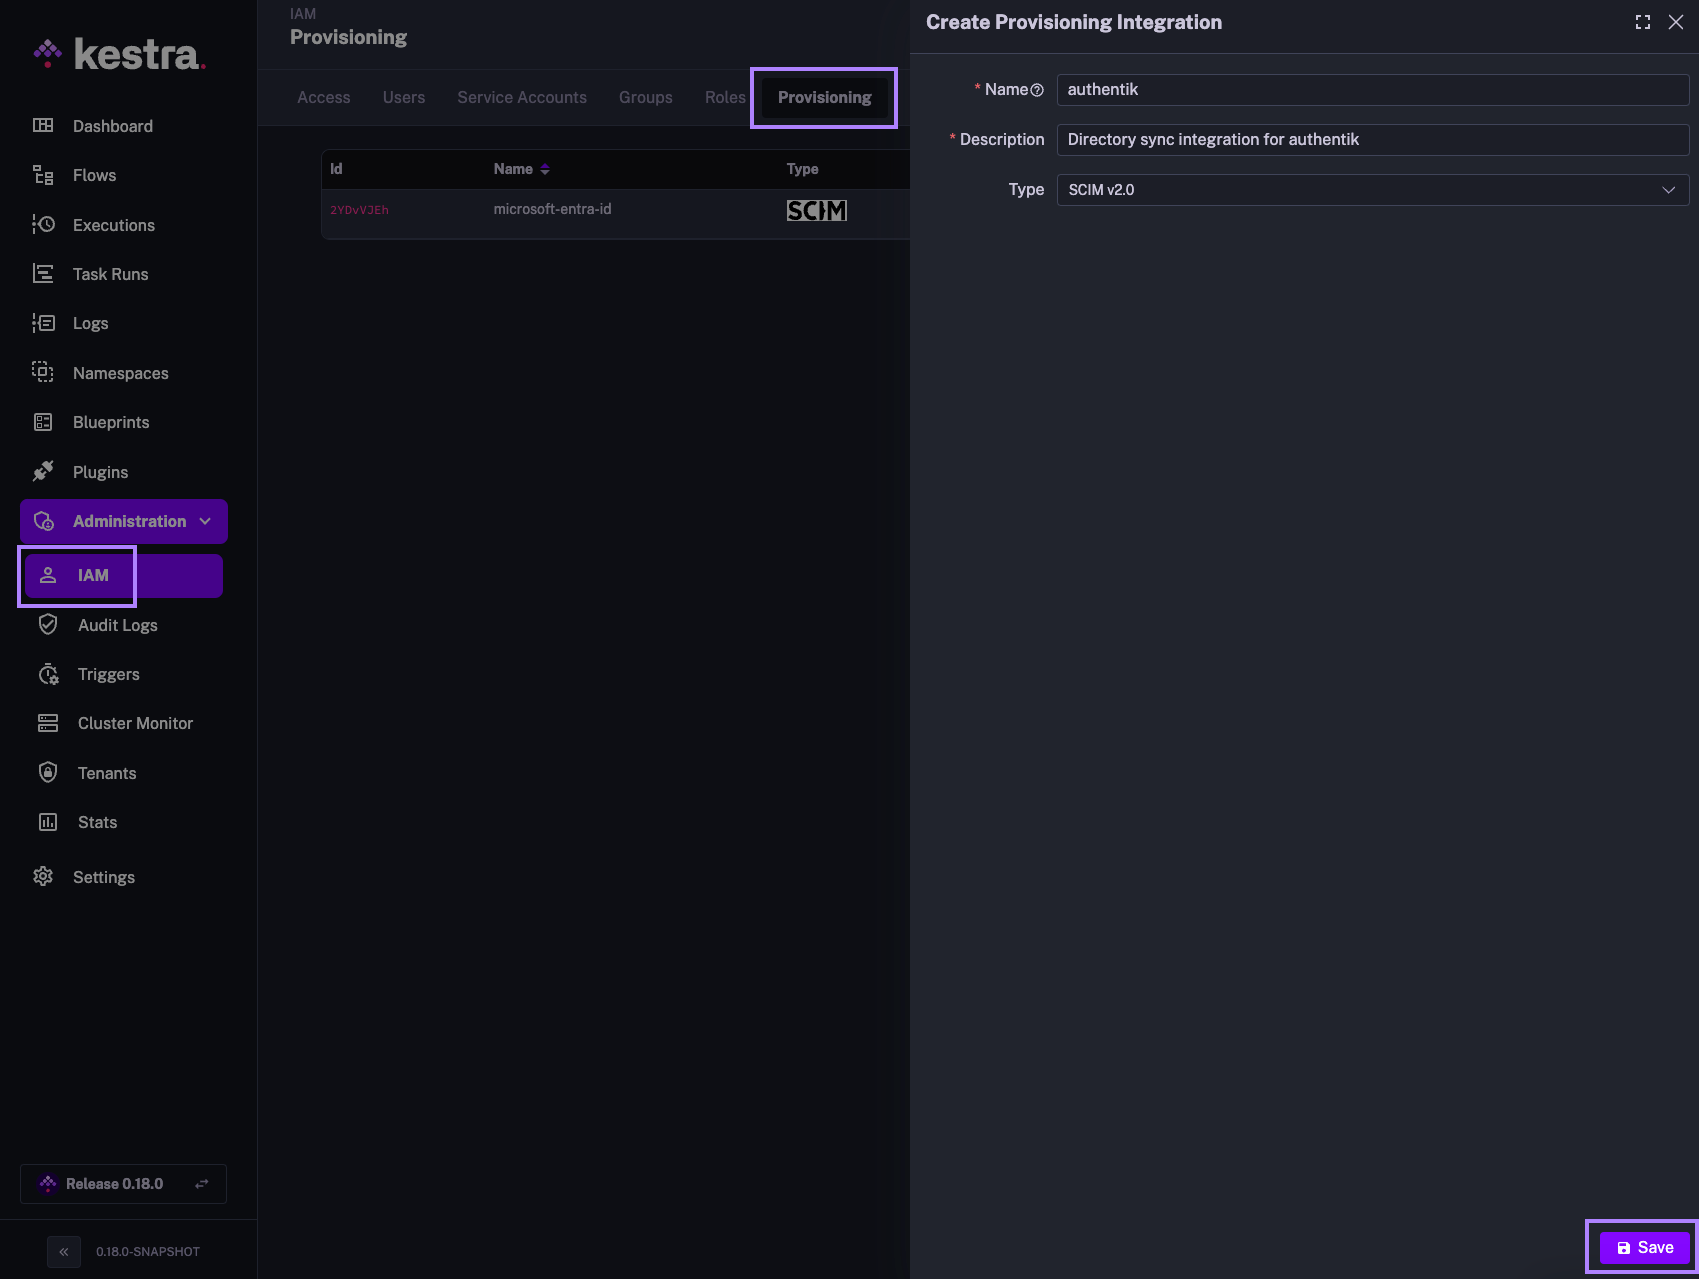
- In the Kestra UI, navigate to the
Administration→IAM→Provisioningpage. - Click on the
Createbutton in the top right corner of the page. - Fill in the following fields:
- Name: Enter a name for the provisioning integration.
- Description: Provide a brief description of the integration.
- Provisioning Type: currently, we only support SCIM 2.0 — leave the default selection and click
Save.
The above steps will generate a SCIM endpoint URL and a Secret Token that you will use to authenticate authentik with the SCIM integration in Kestra. Save those details as we will need them in the next steps.
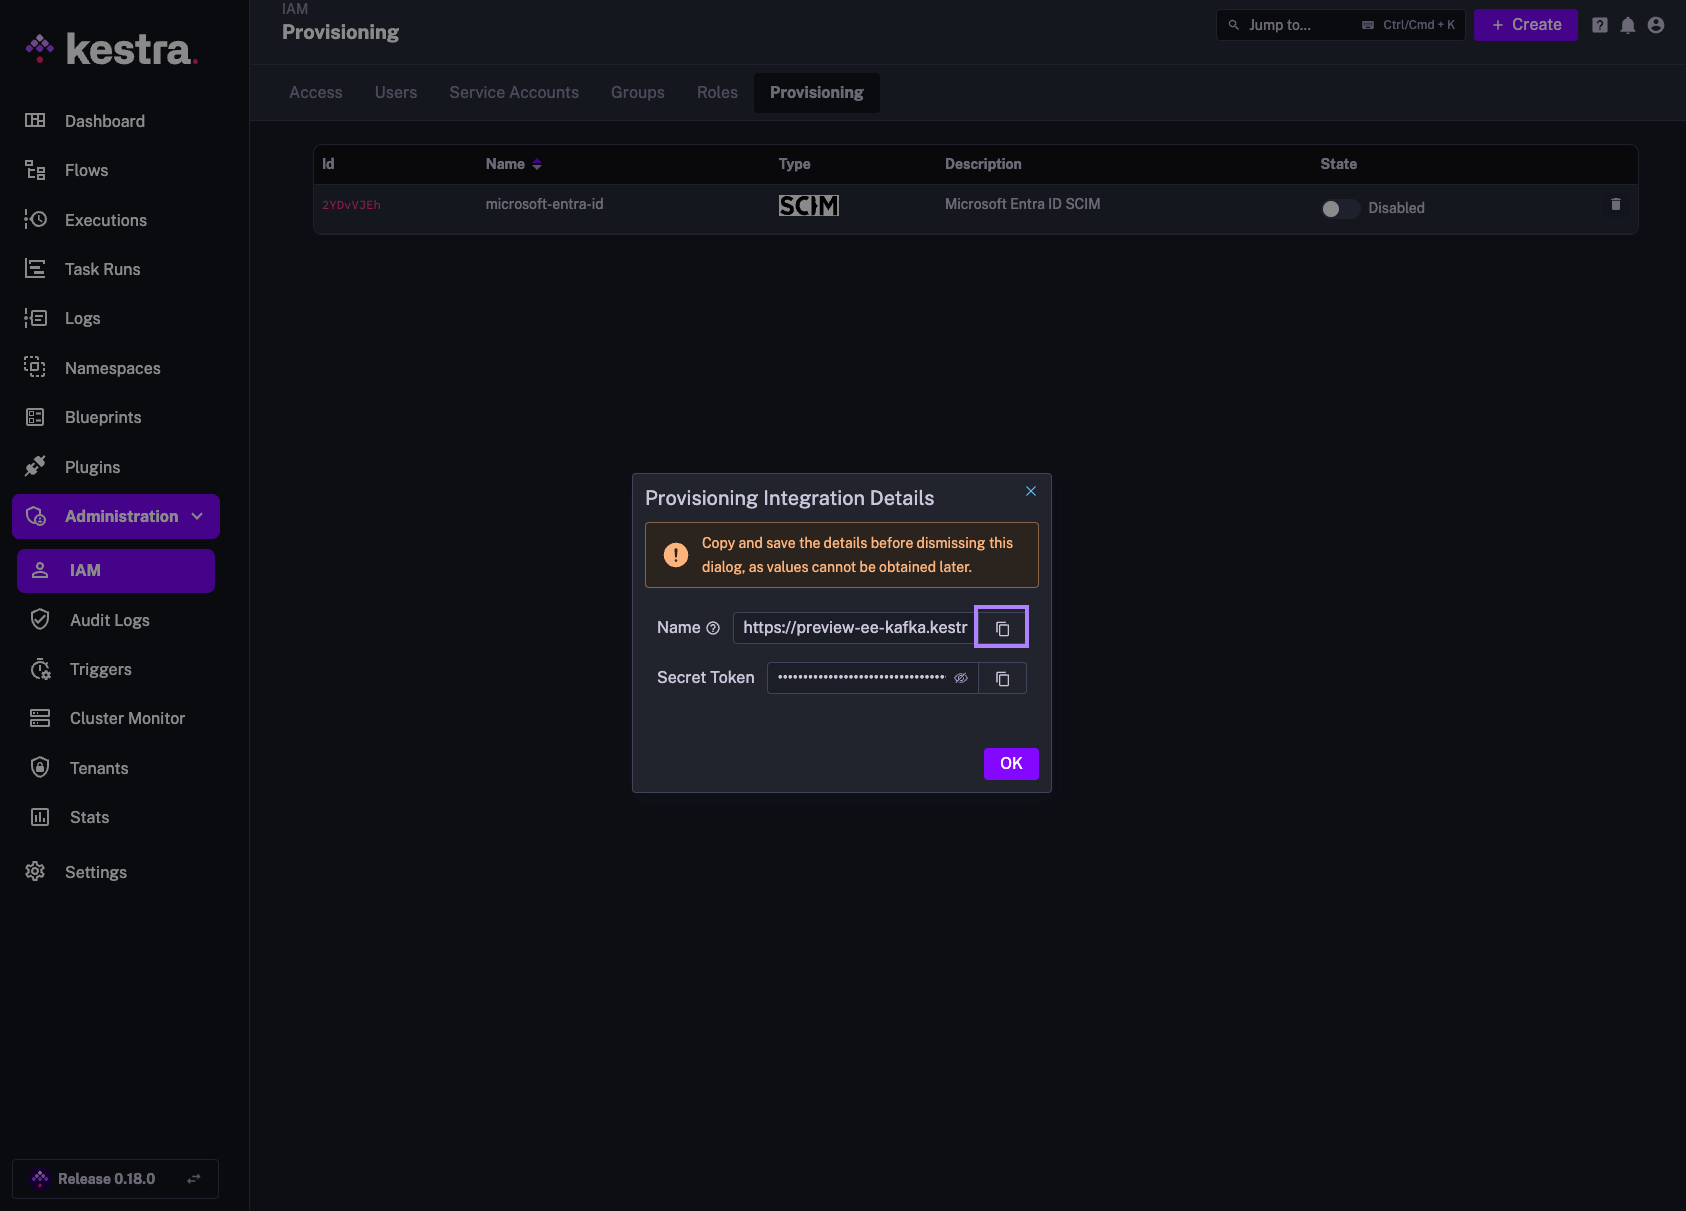
The endpoint should look as follows:
https://your_kestra_host/api/v1/your_tenant/integrations/integration_id/scim/v2
The Secret Token will be a long string (ca. 200 characters) that will authenticate requests from authentik to Kestra.
Enable or Disable SCIM Integration
Note that you can disable or completely remove the SCIM Integration at any time. When an integration is disabled, all incoming requests for that integration endpoint will be rejected.
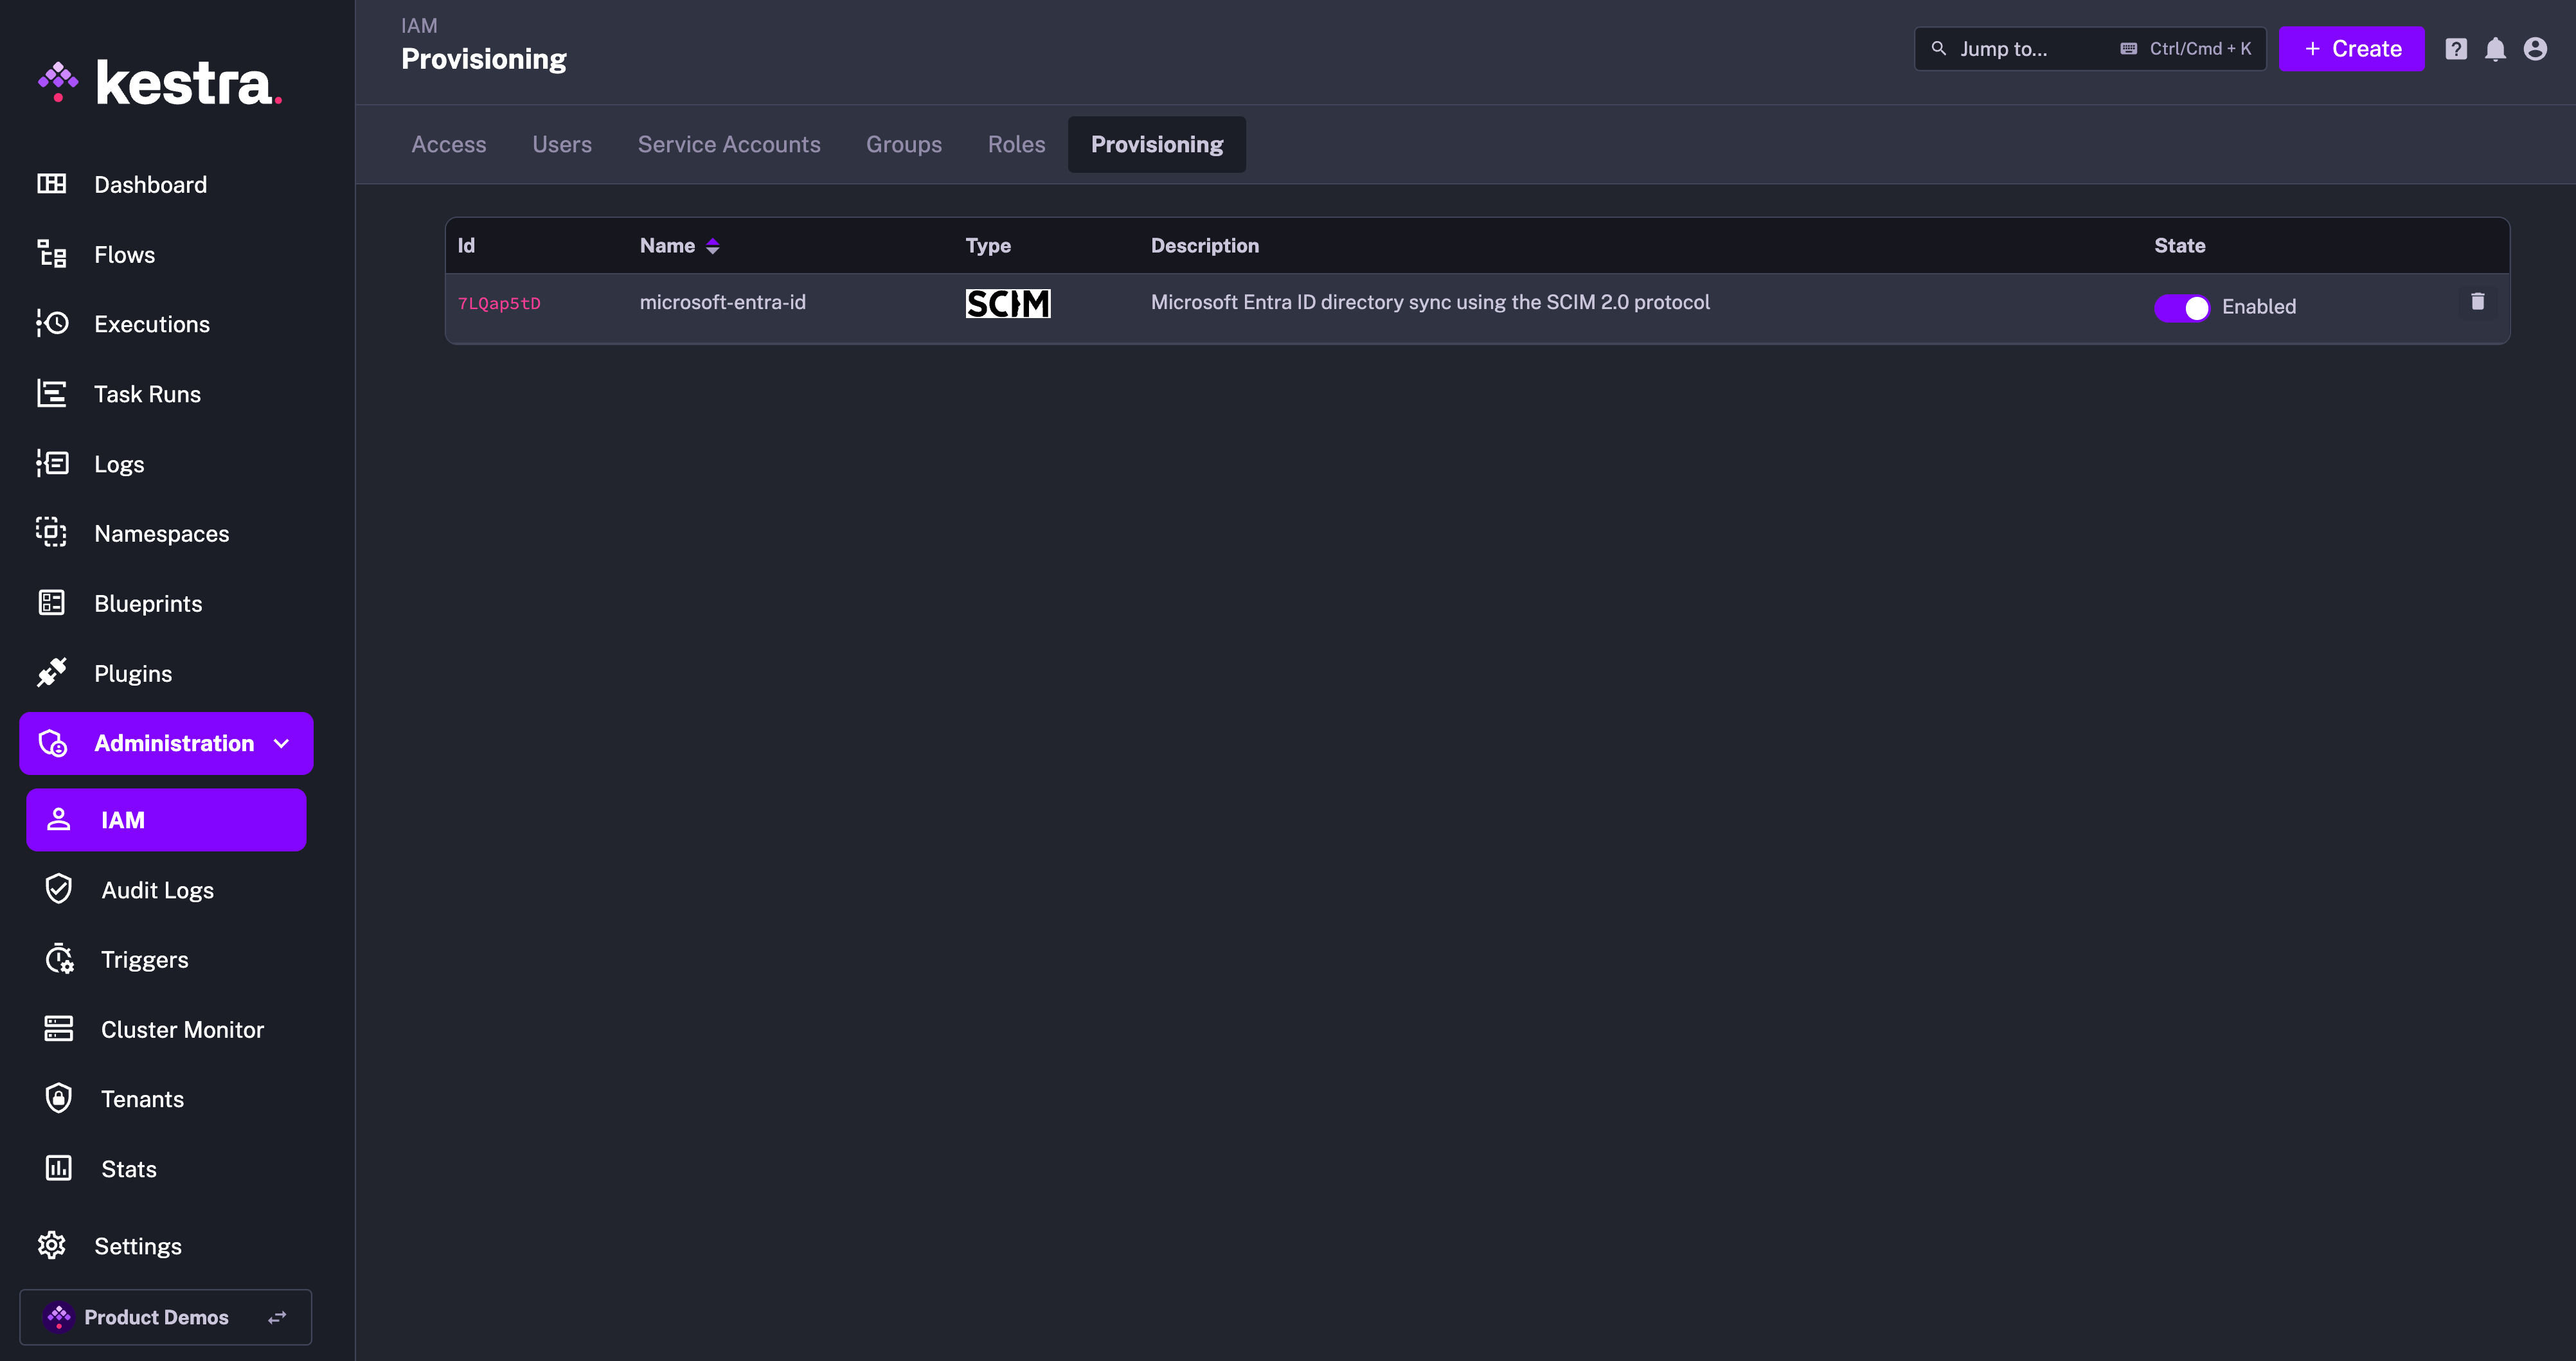
At first, you can disable the integration to configure your authentik SCIM integration, and then enable it once the configuration is complete.
IAM Role and Service Account
When creating a new Provisioning Integration, Kestra will automatically create two additional objects:
- Role
SCIMProvisionerwith the following permissions:GROUPS:CREATE,READUPDATE,DELETEUSERS:CREATE,READ,UPDATEBINDINGS:CREATE,READ,UPDATE,DELETE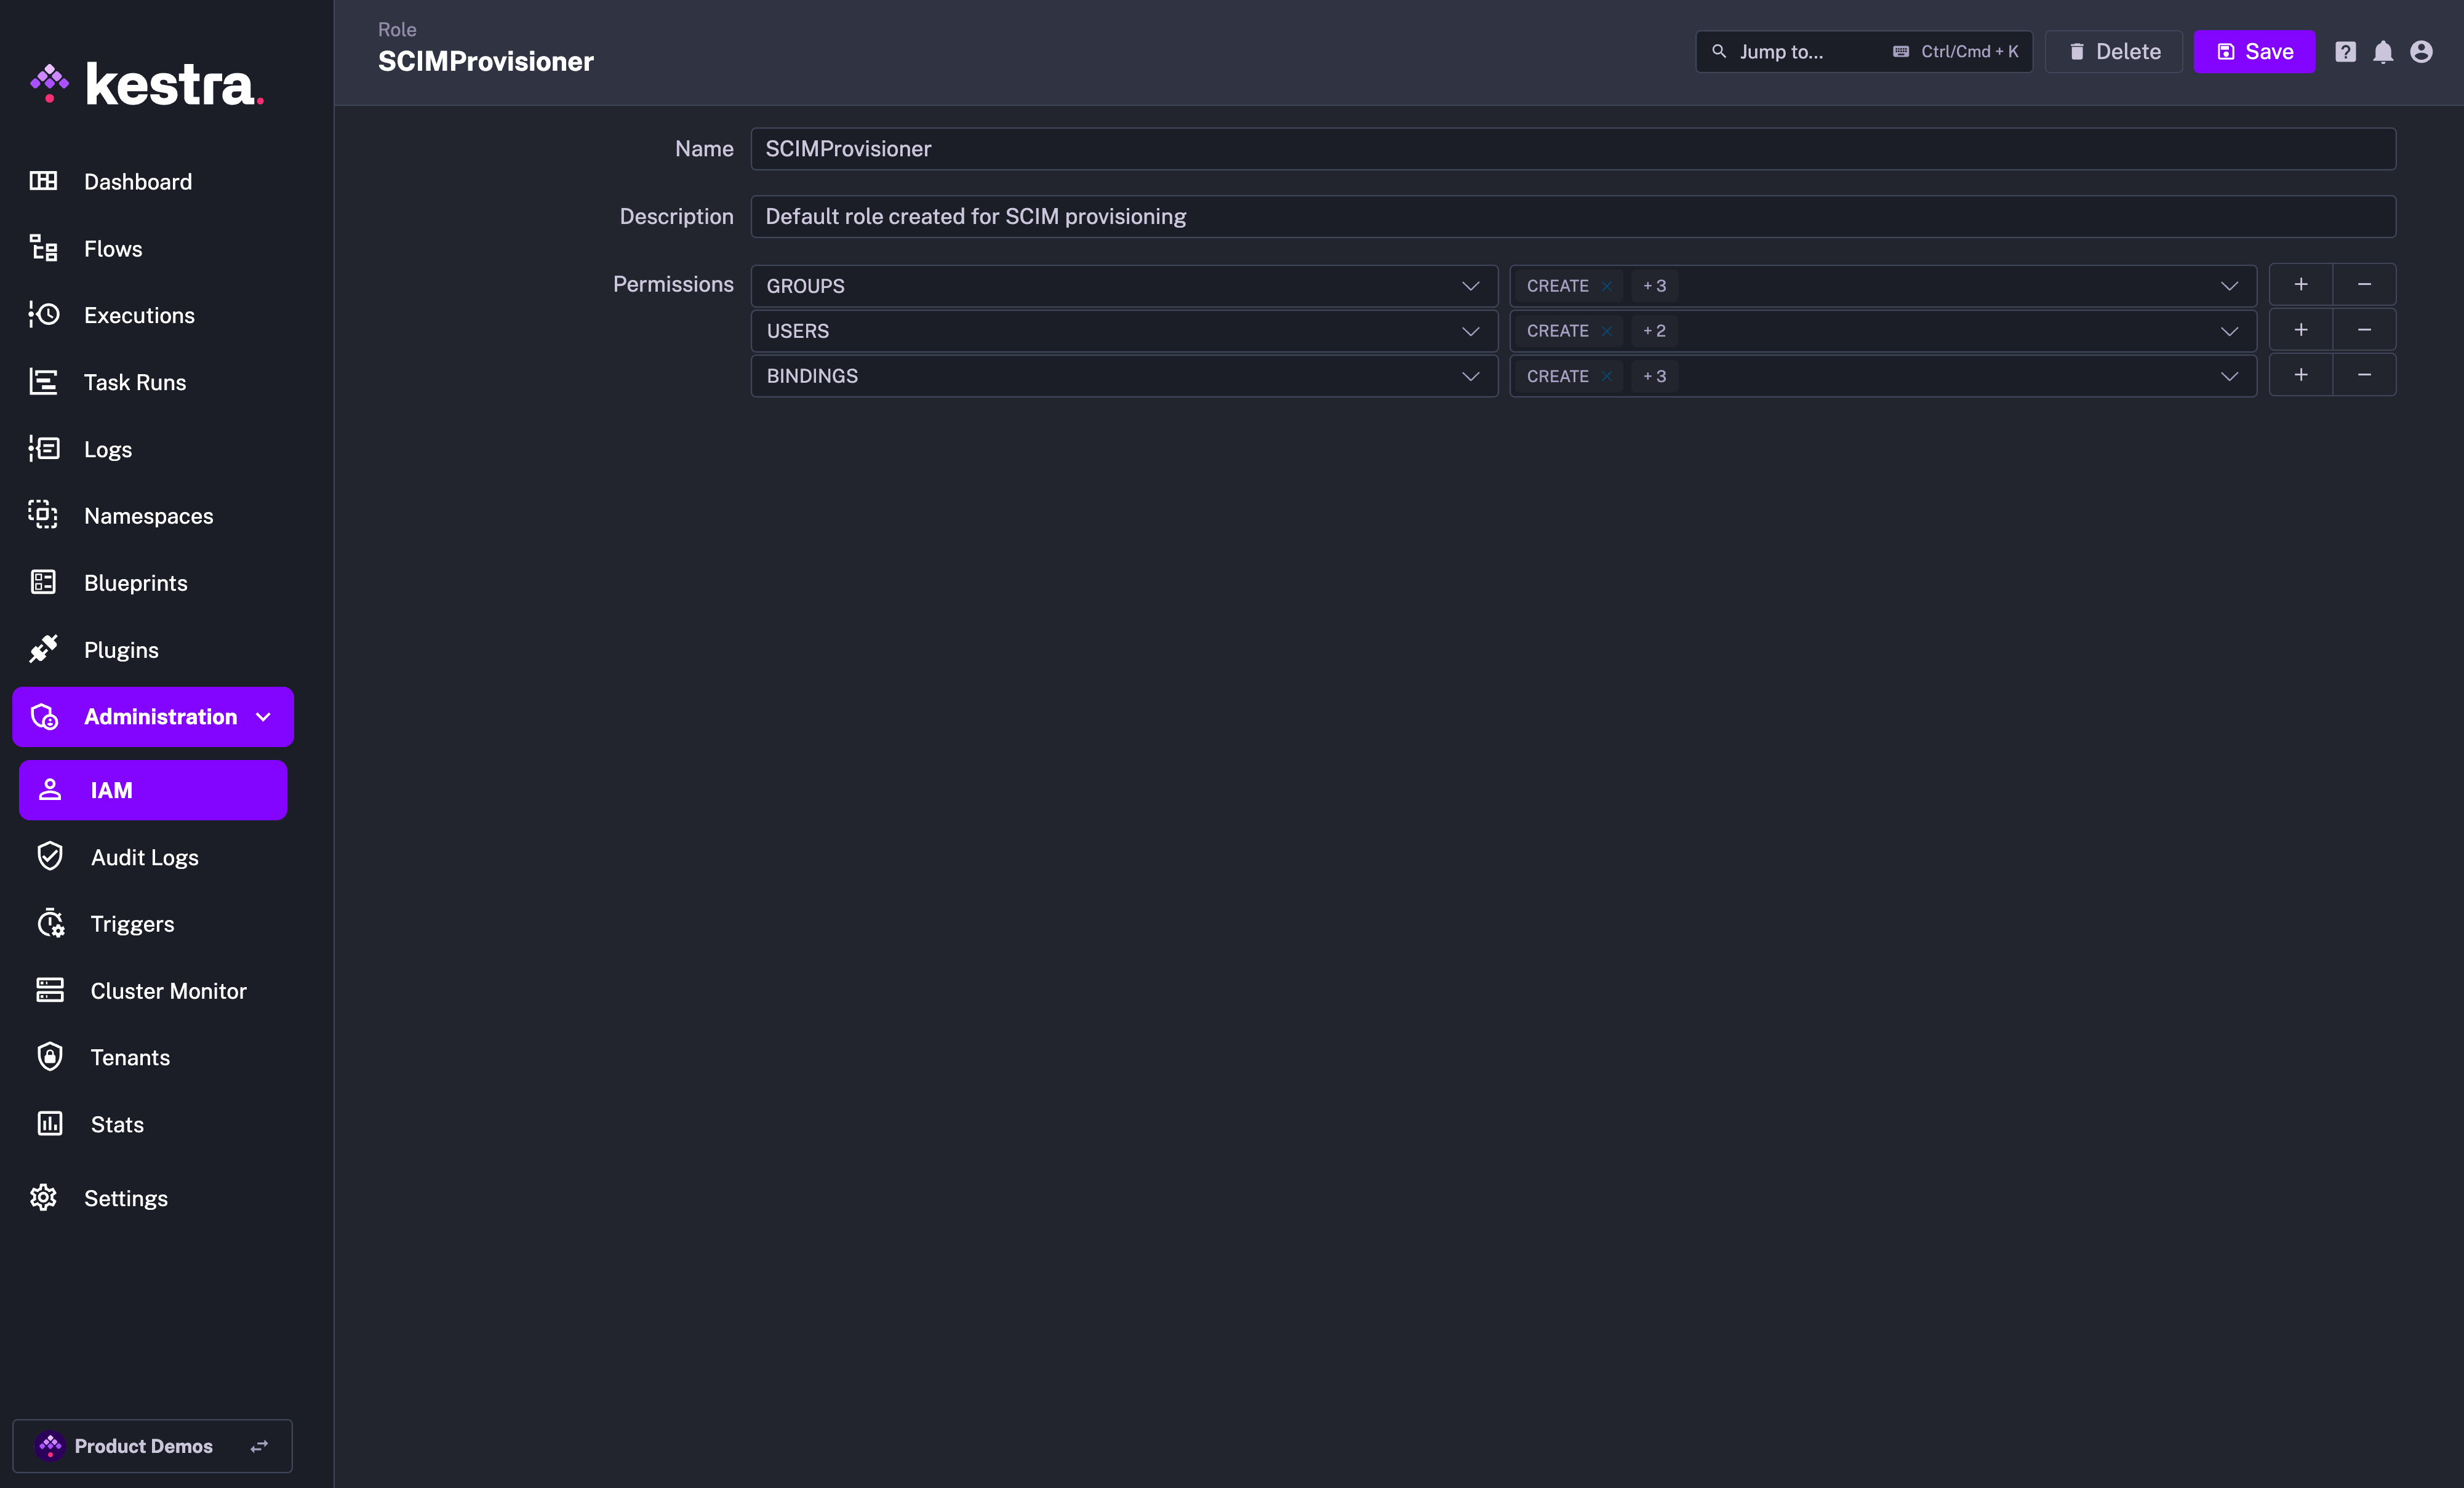
- Service Account with an API Token which was previously displayed as a Secret Token for the integration:
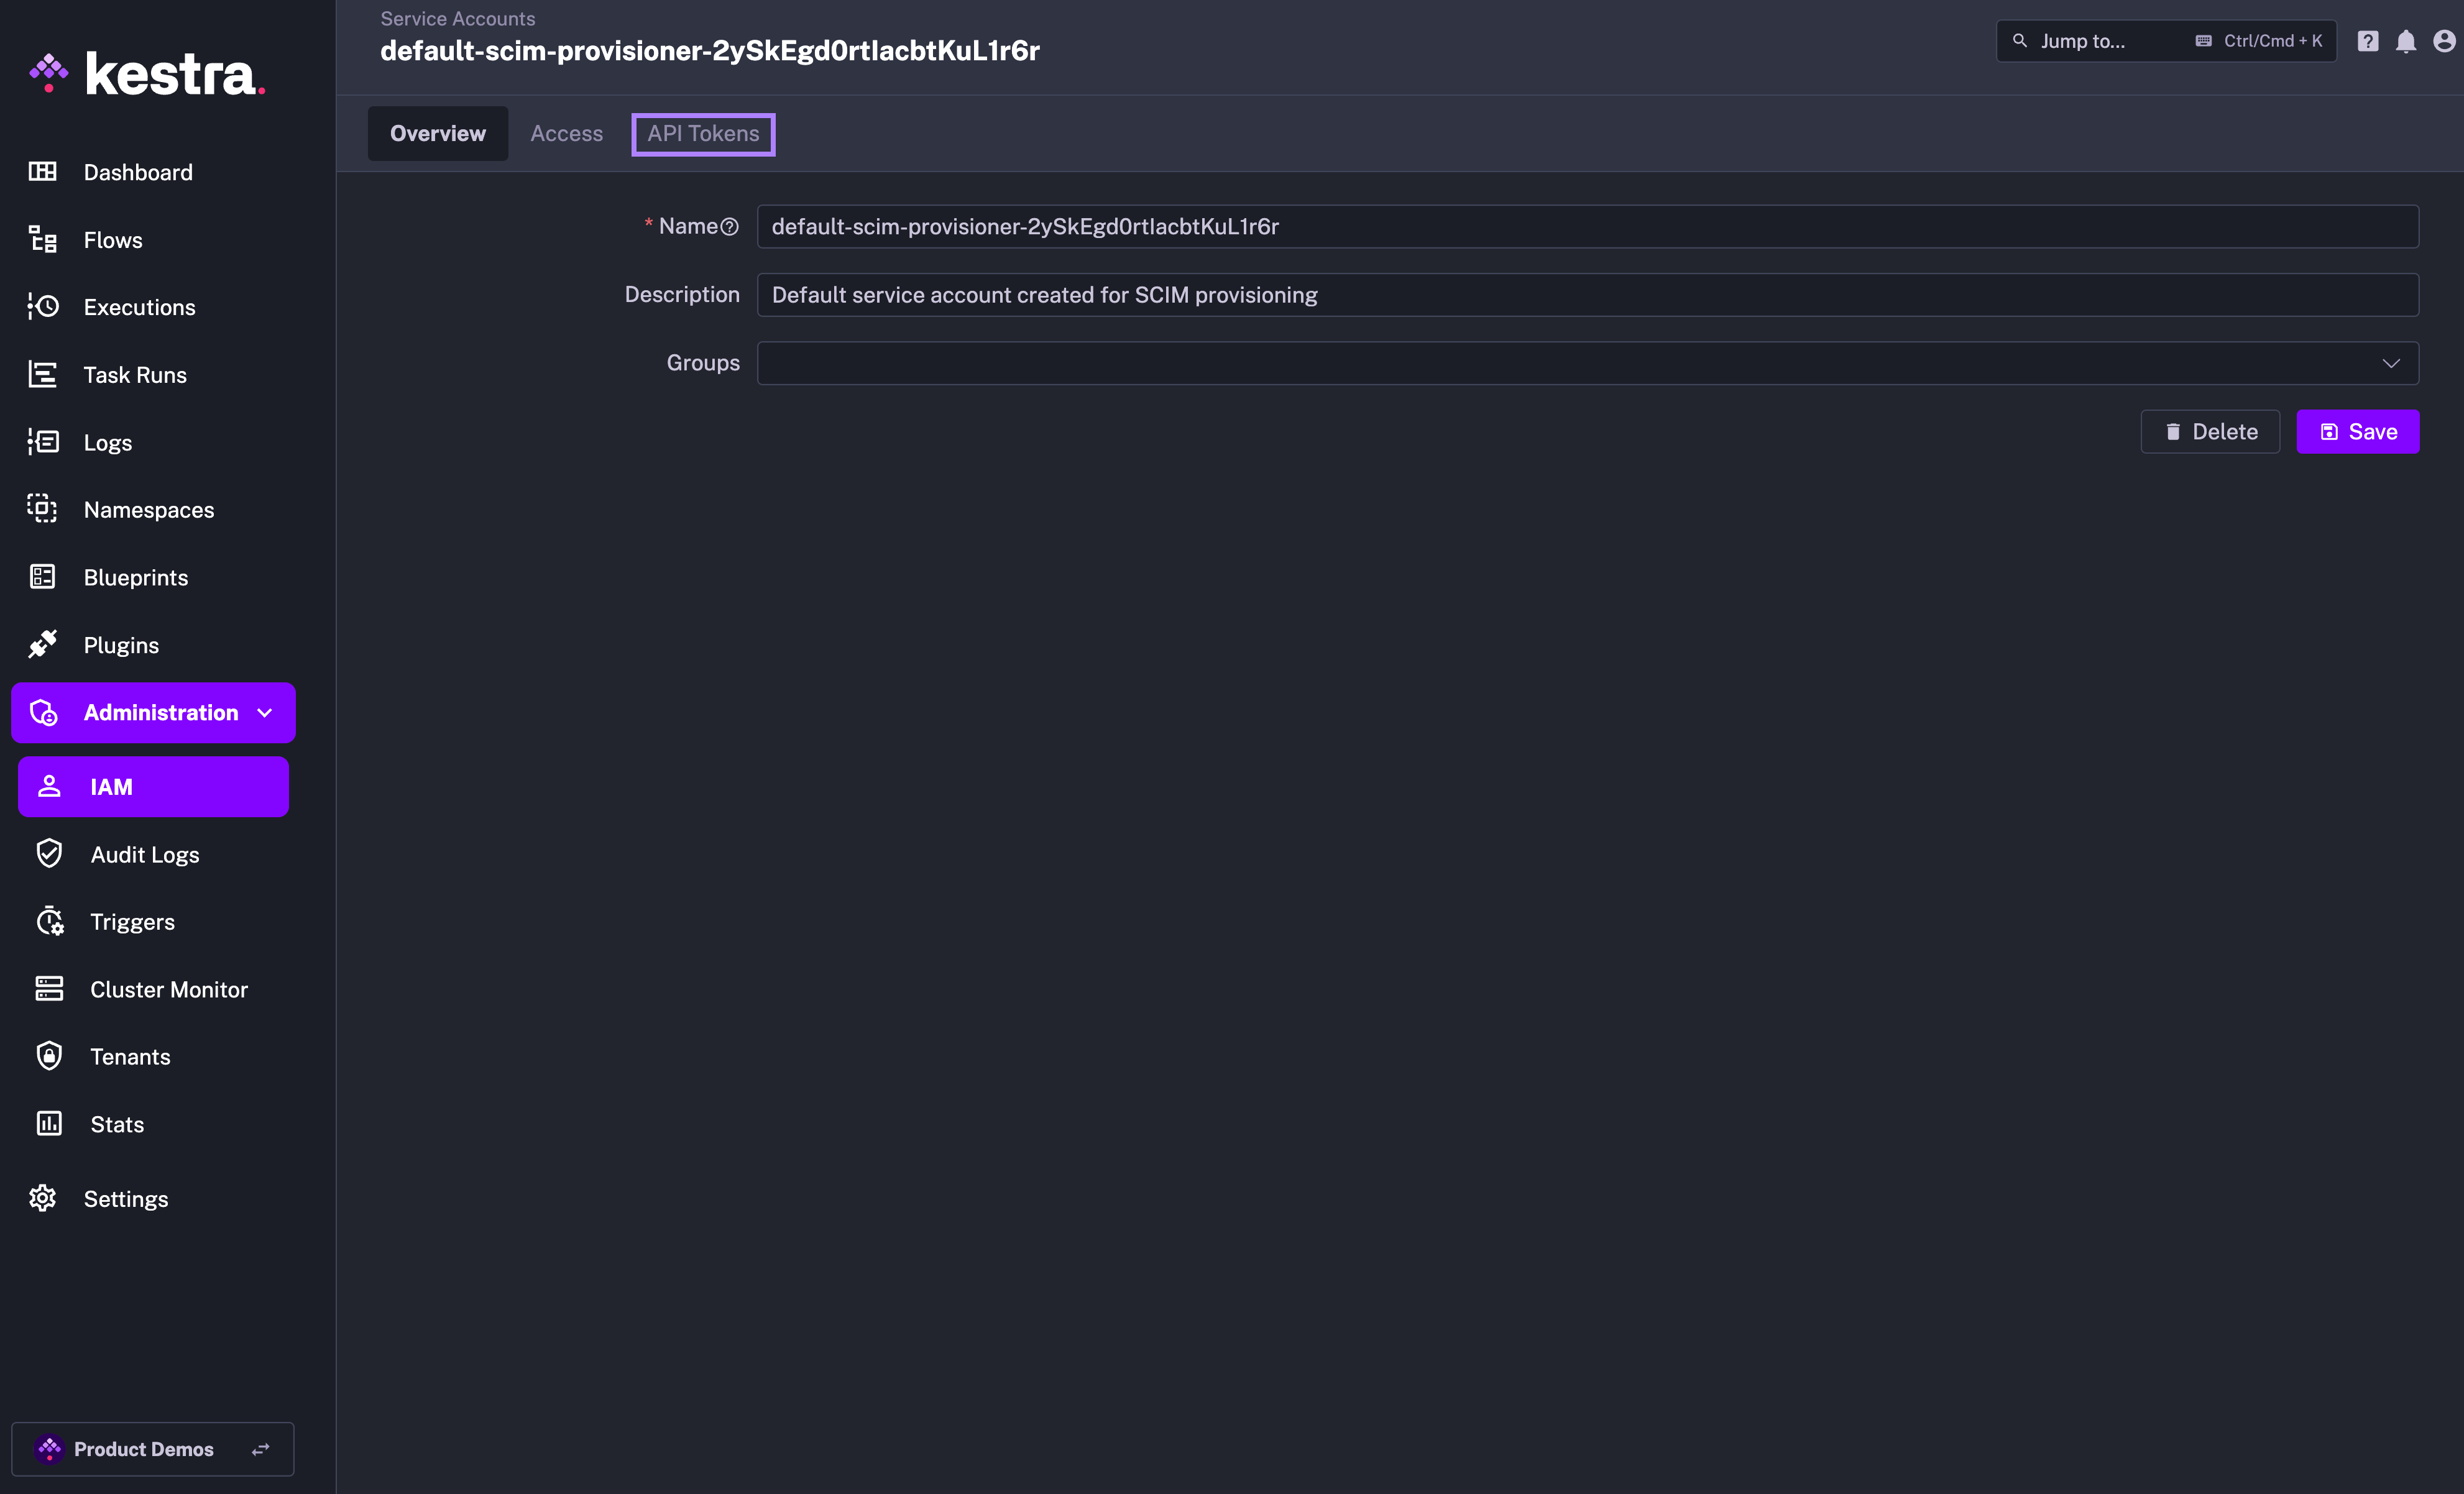
Why the SCIMProvisioner role doesn't have the DELETE permission for USERS? This is because you cannot delete a user through our SCIM implementation. Users are global and SCIM provisioning is per tenant. When we receive a DELETE query for a user, we remove their tenant access but the user itself remains in the system.
authentik SSO Setup
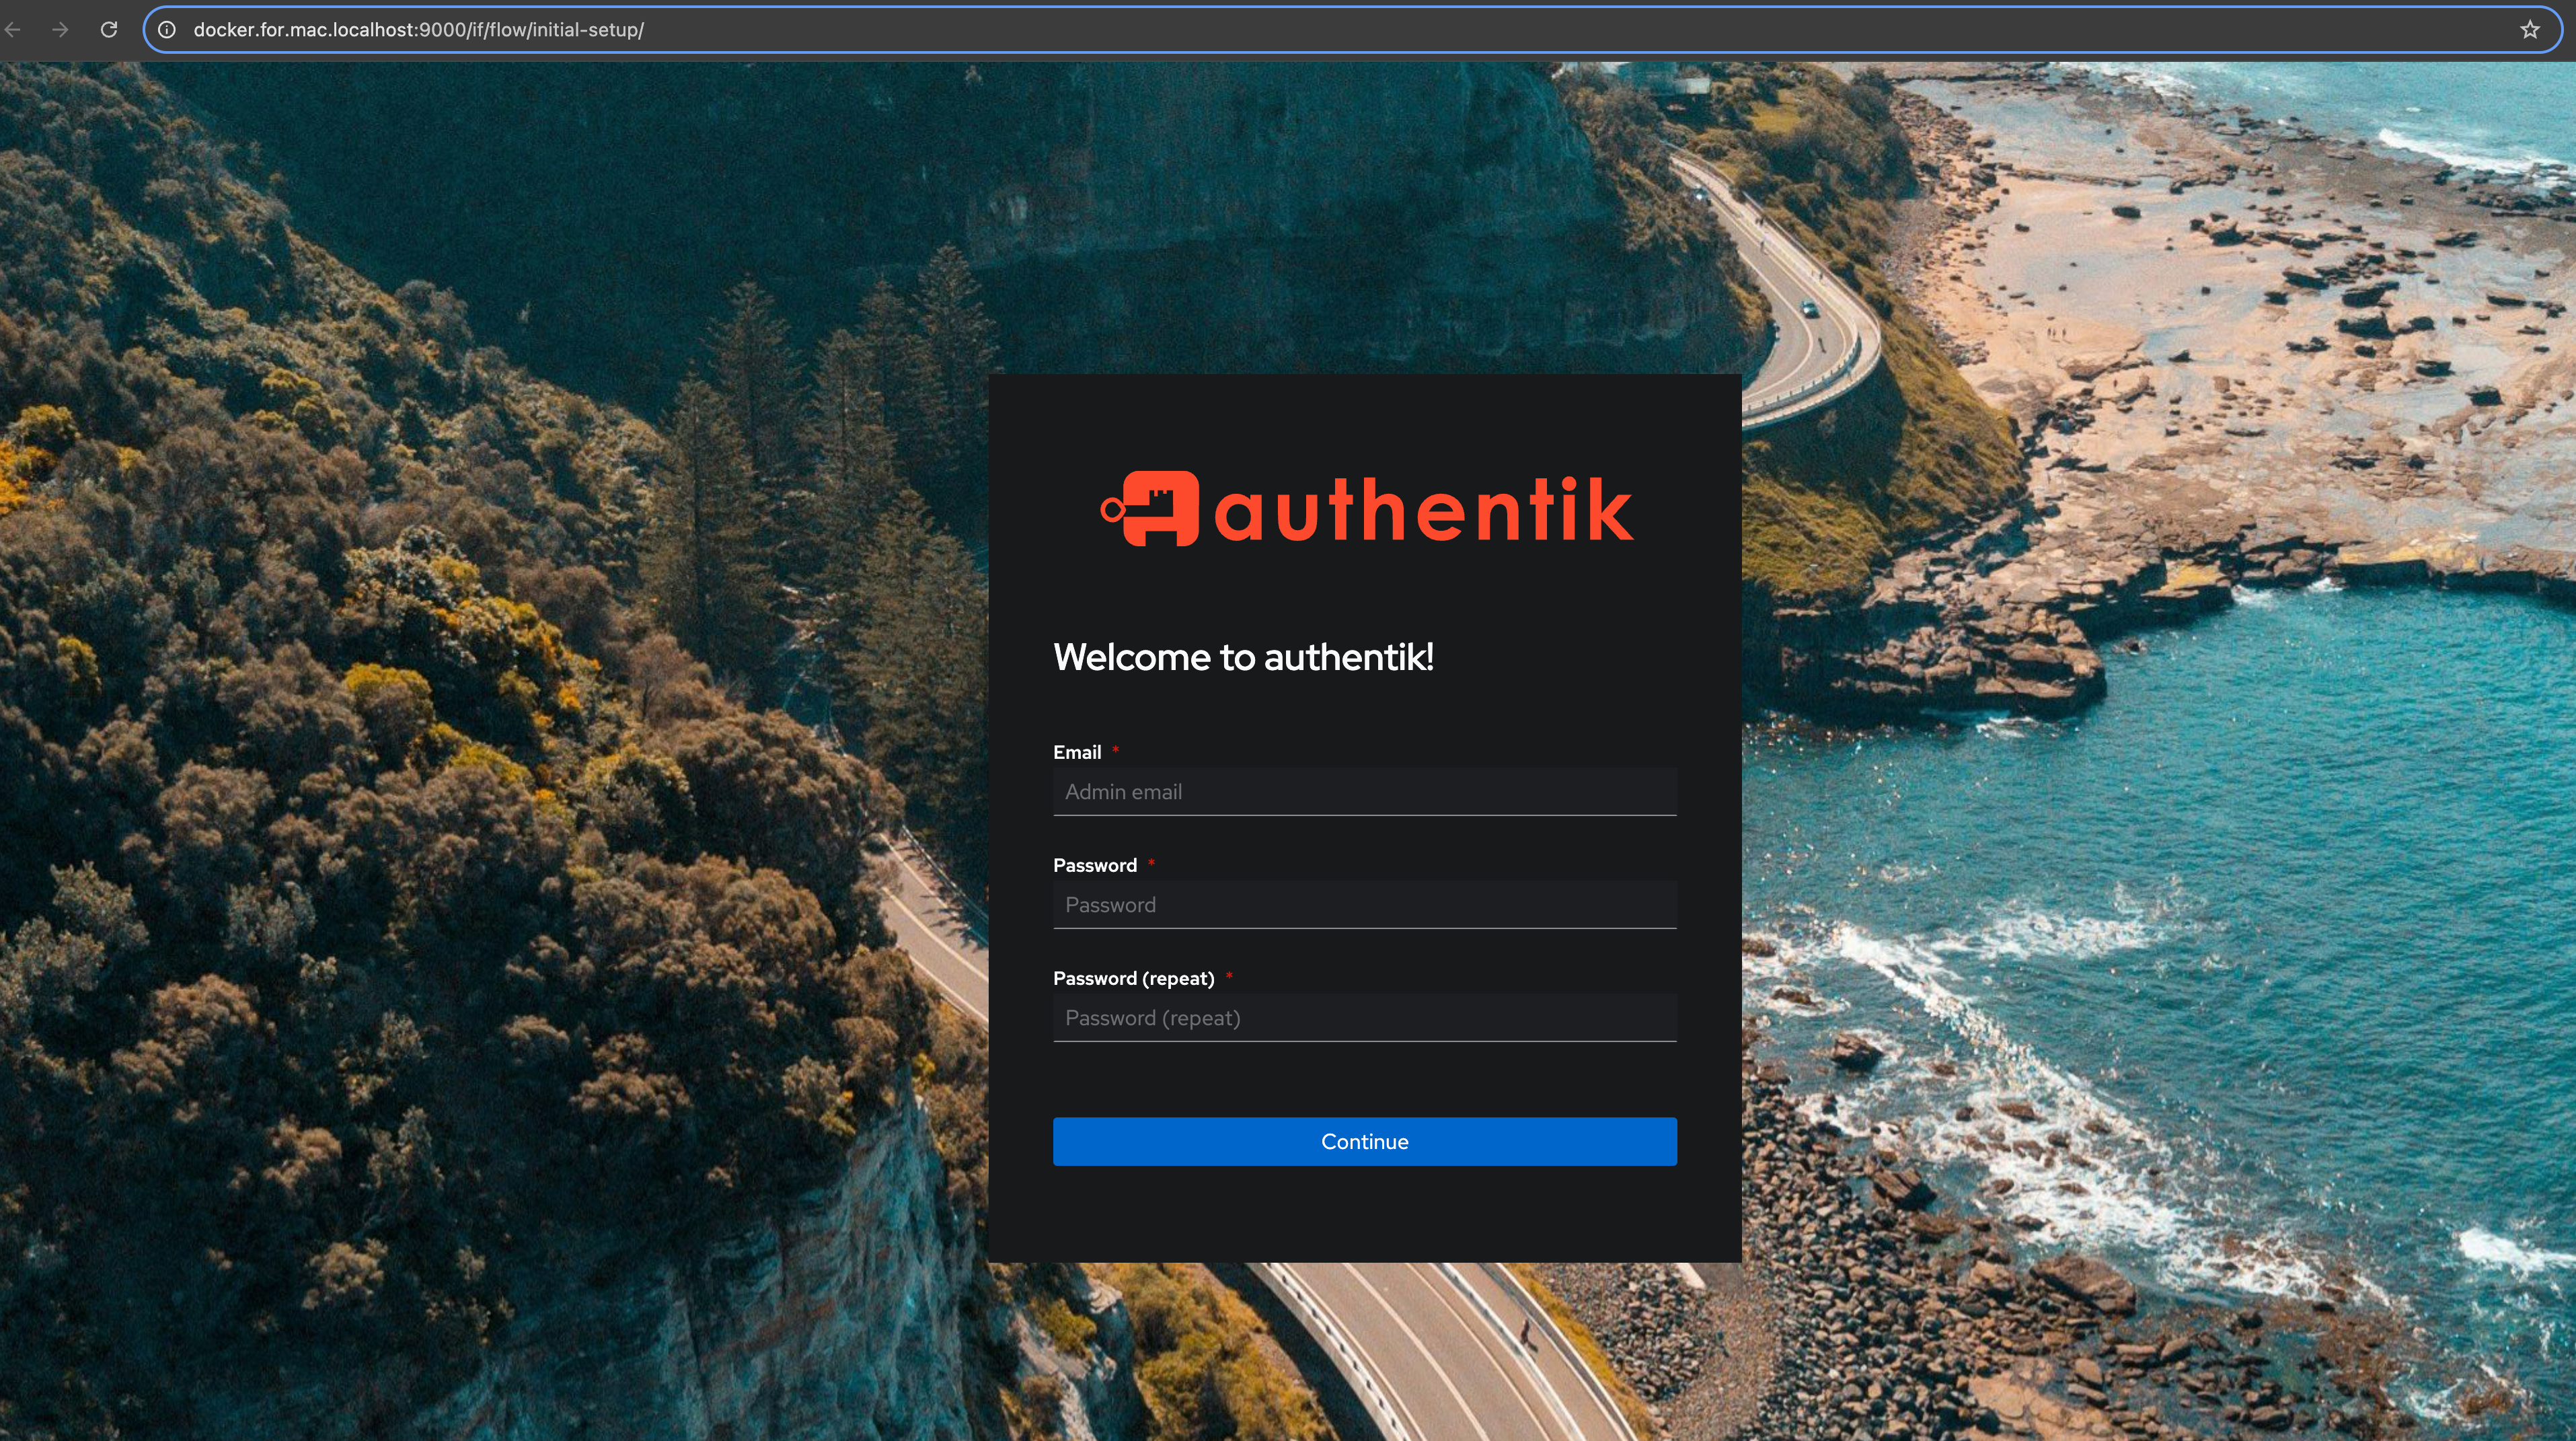
Install authentik
Authentik provides a simple docker-compose installer for testing purposes. Follow the instructions and click on the initial setup URL http://docker.for.mac.localhost:9000/if/flow/initial-setup/ to create your first user.
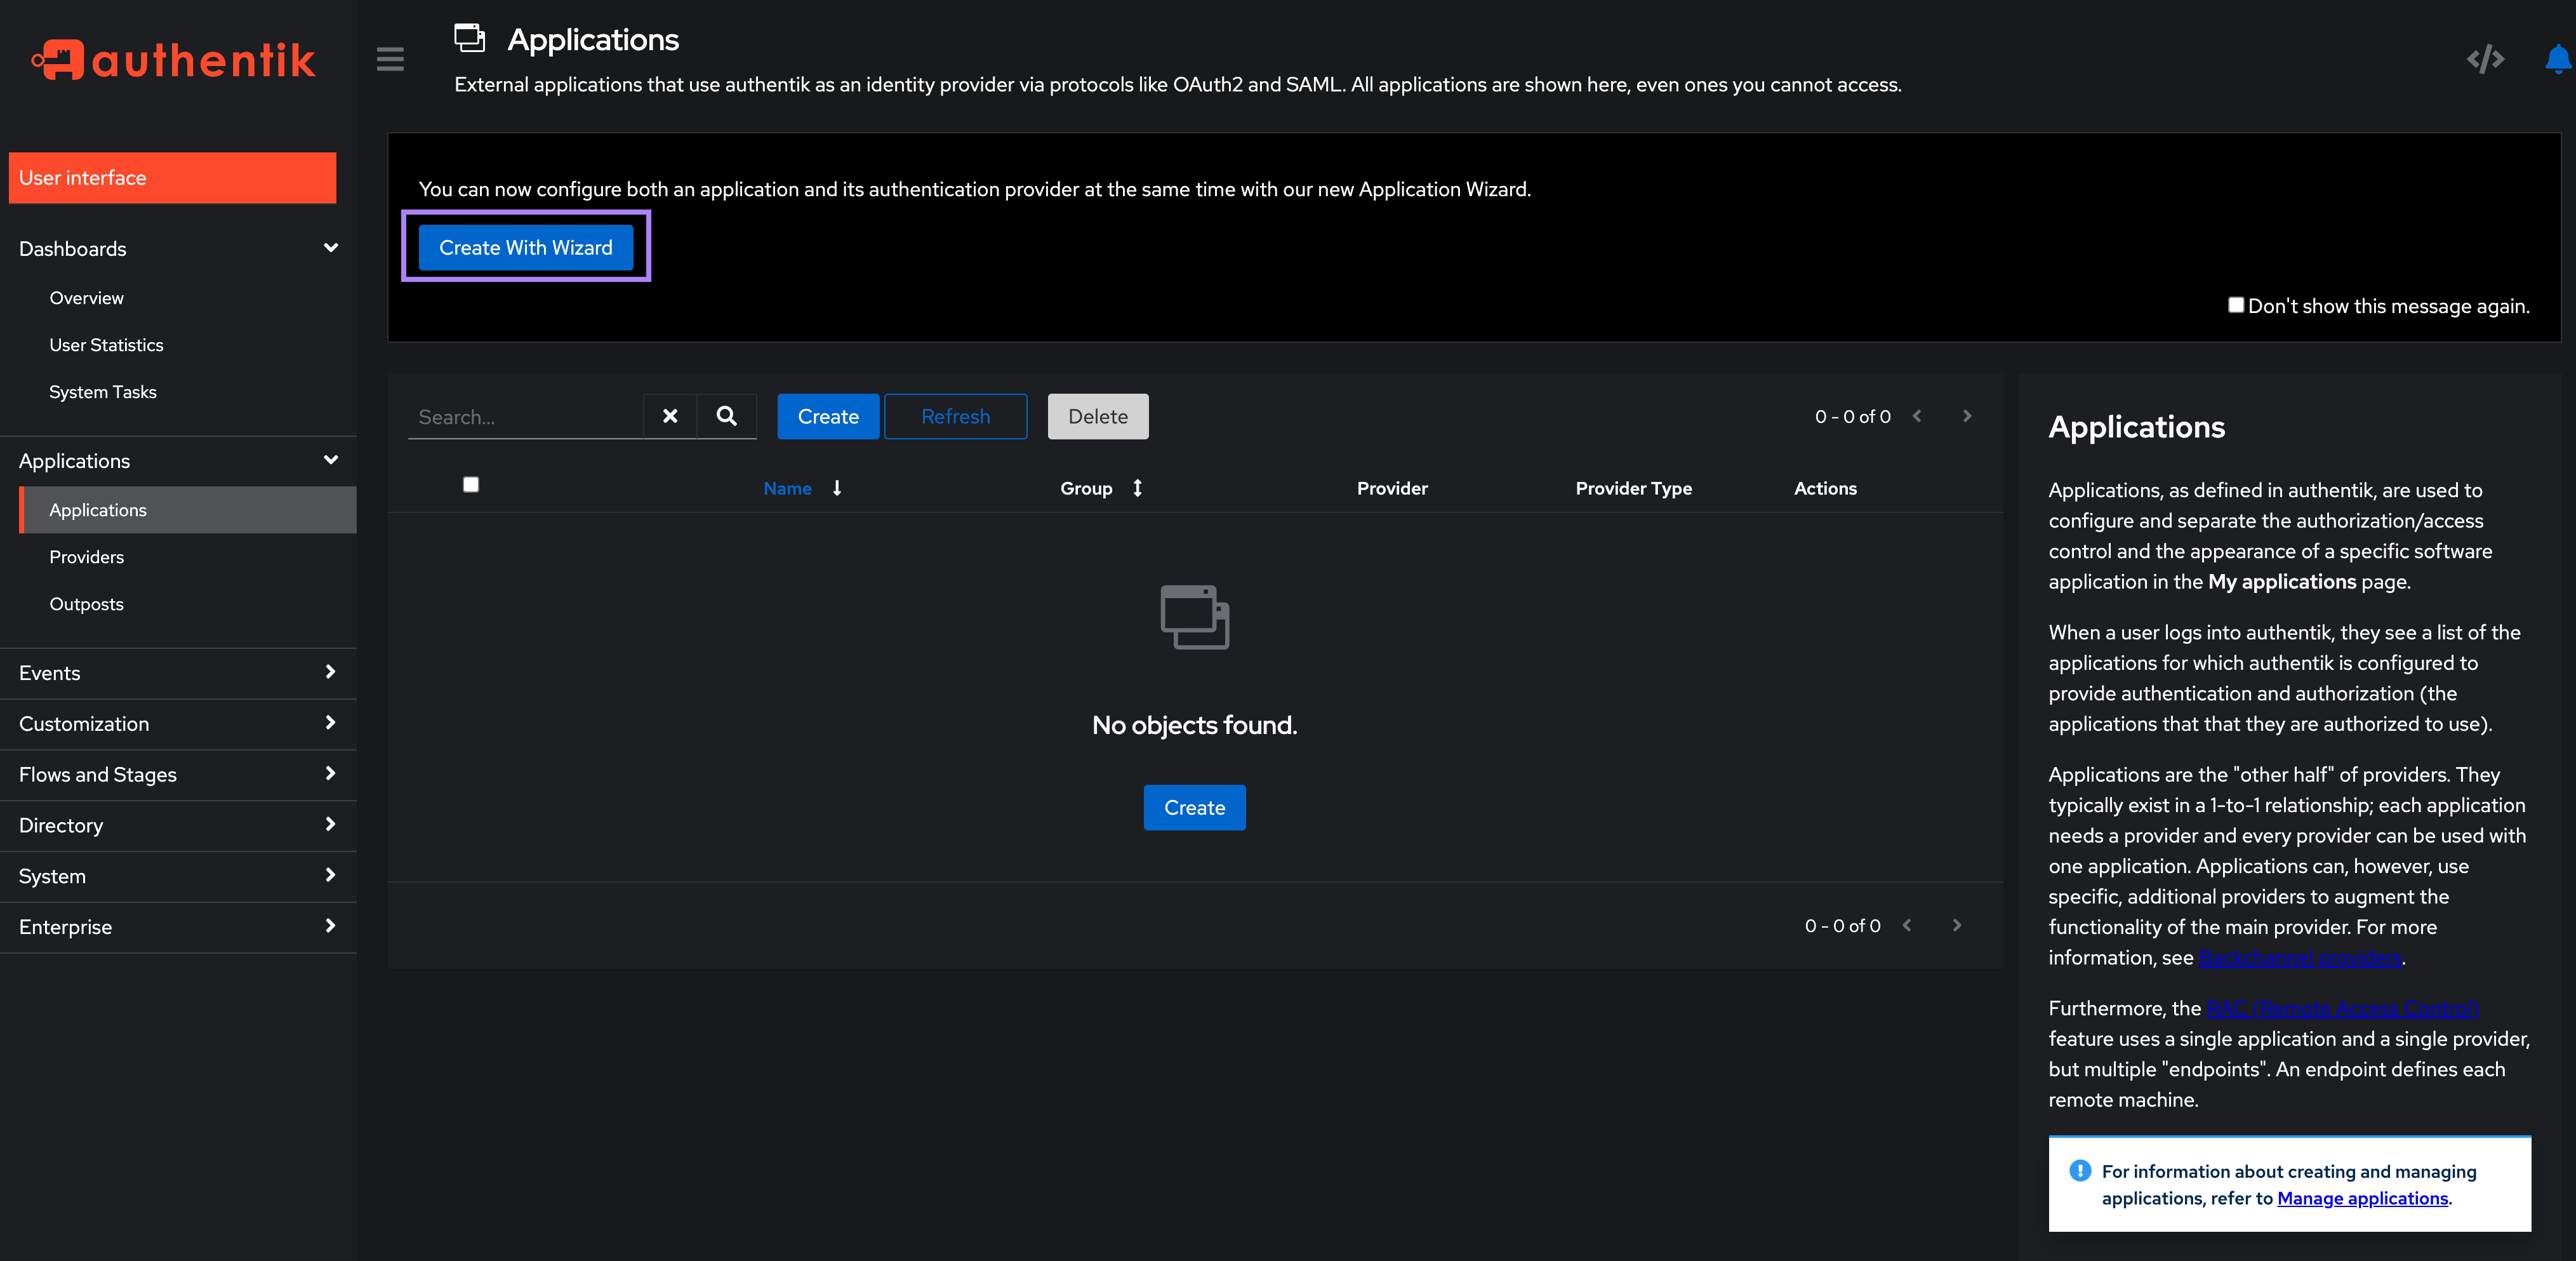
Create Application and SSO Provider in authentik
On the left-hand side select Applications → Applications. For simplicity we’ll use the Create with Wizard button as this will create both an application and a provider.
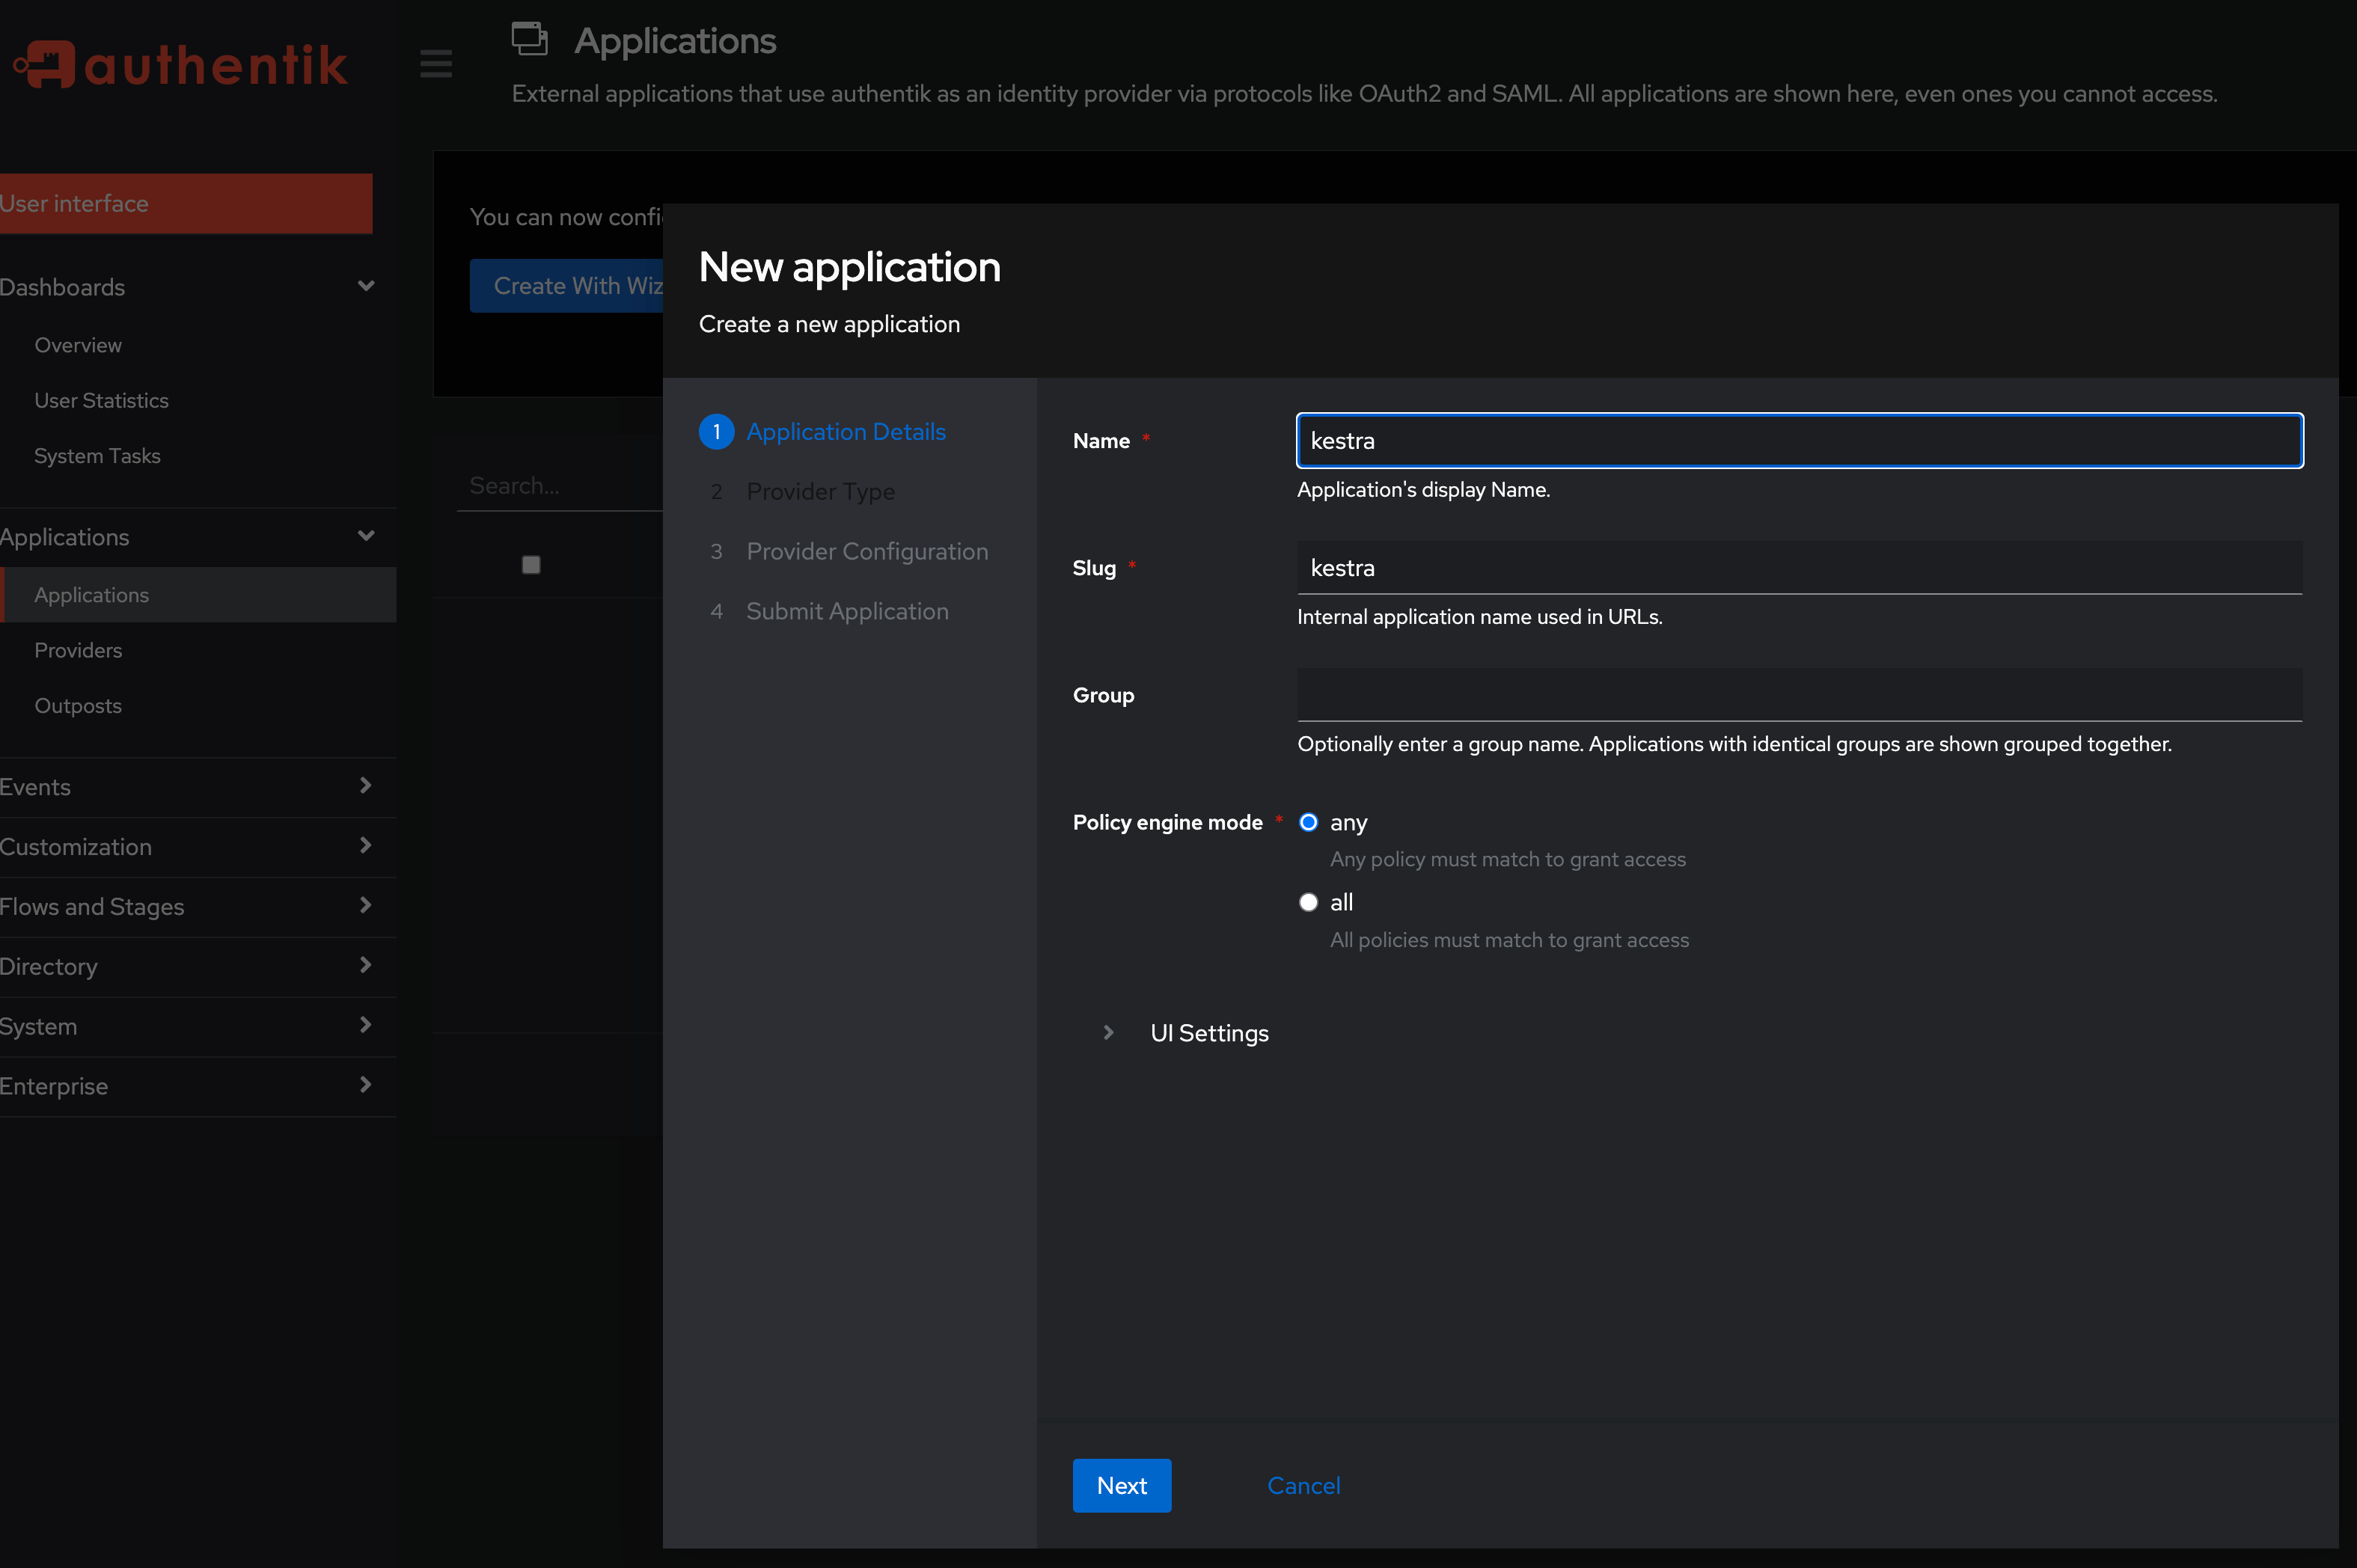
On the Application Details screen, fill in the application name and slug. Set both here to kestra and click Next.
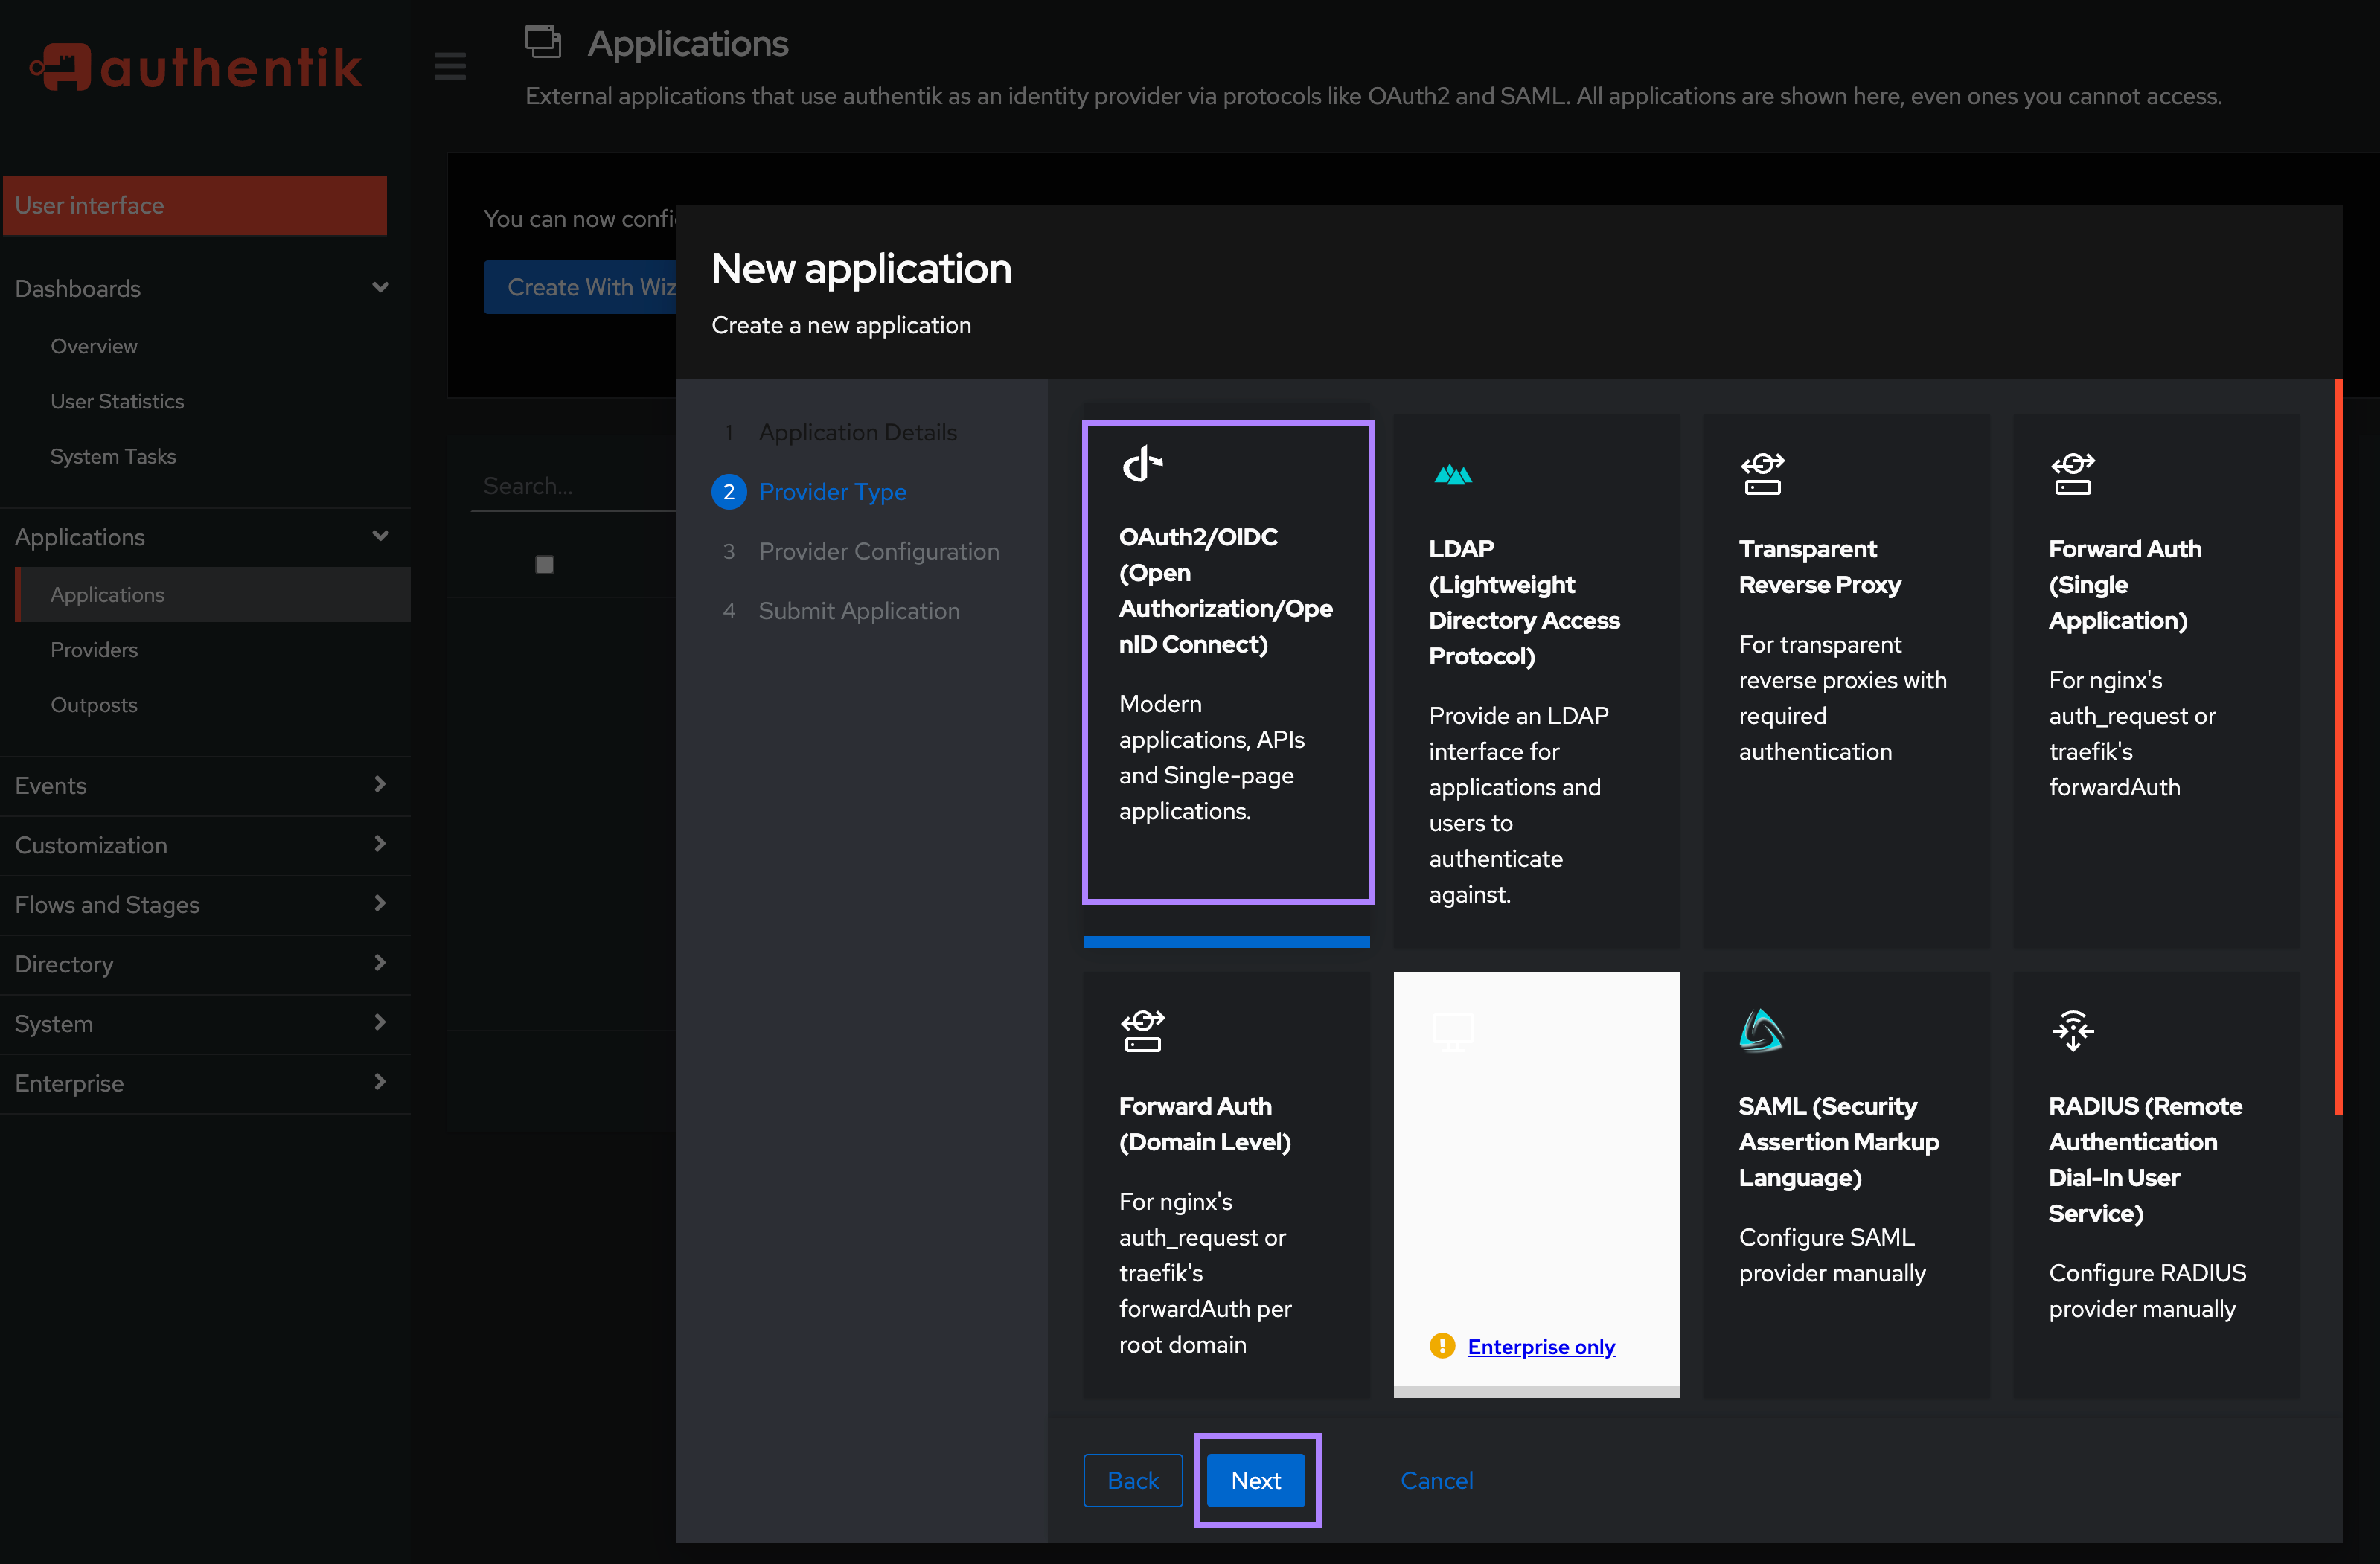
On the Provider Type screen, select OAuth2/OIDC and click Next.
On the Provider Configuration screen:
- In the
Authentication flowfield, select “default-authentication-flow (Welcome to authentik!)” - In the
Authorization flowfield, select “default-provider-authorization-explicit-consent (Authorize Application)”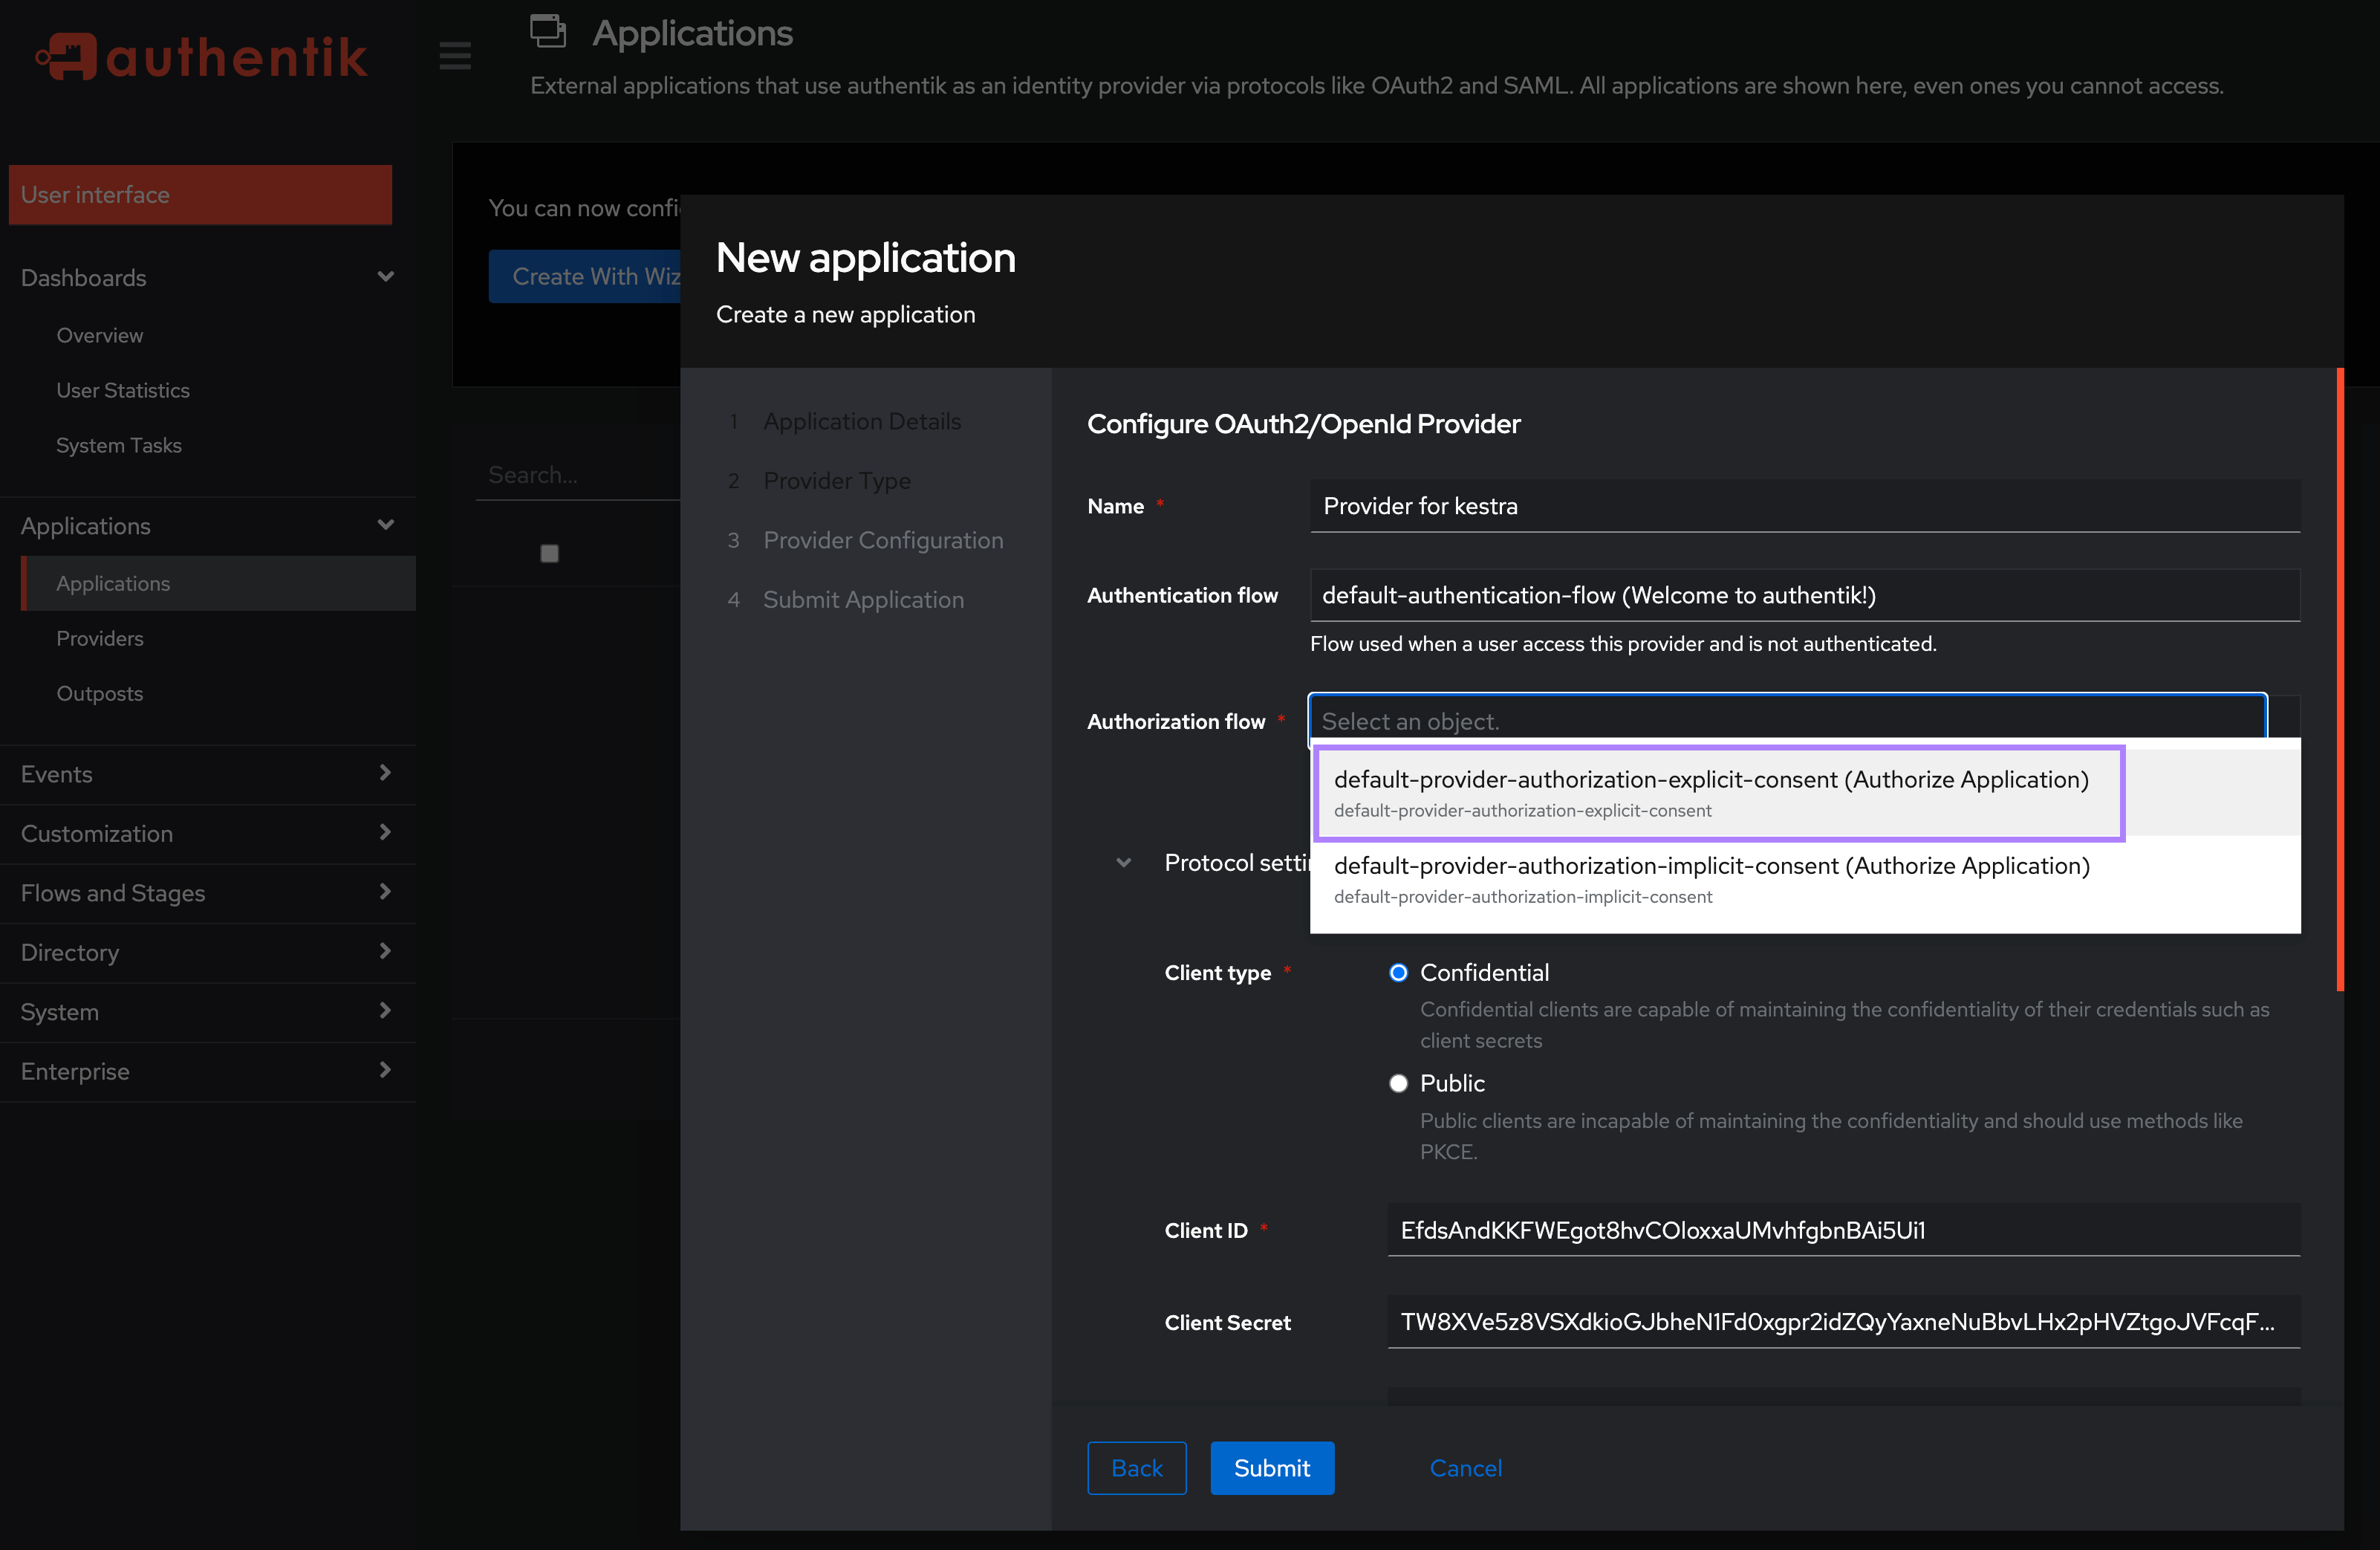
- Keep the Client type as
Confidentialand under theRedirect URIs/Origins (RegEx), enter your Kestra host's/oauth/callback/authentikendpoint in the formathttp://<kestra_host>:<kestra_port>/oauth/callback/authentike.g. http://localhost:8080/oauth/callback/authentik and thenSubmitthe Application: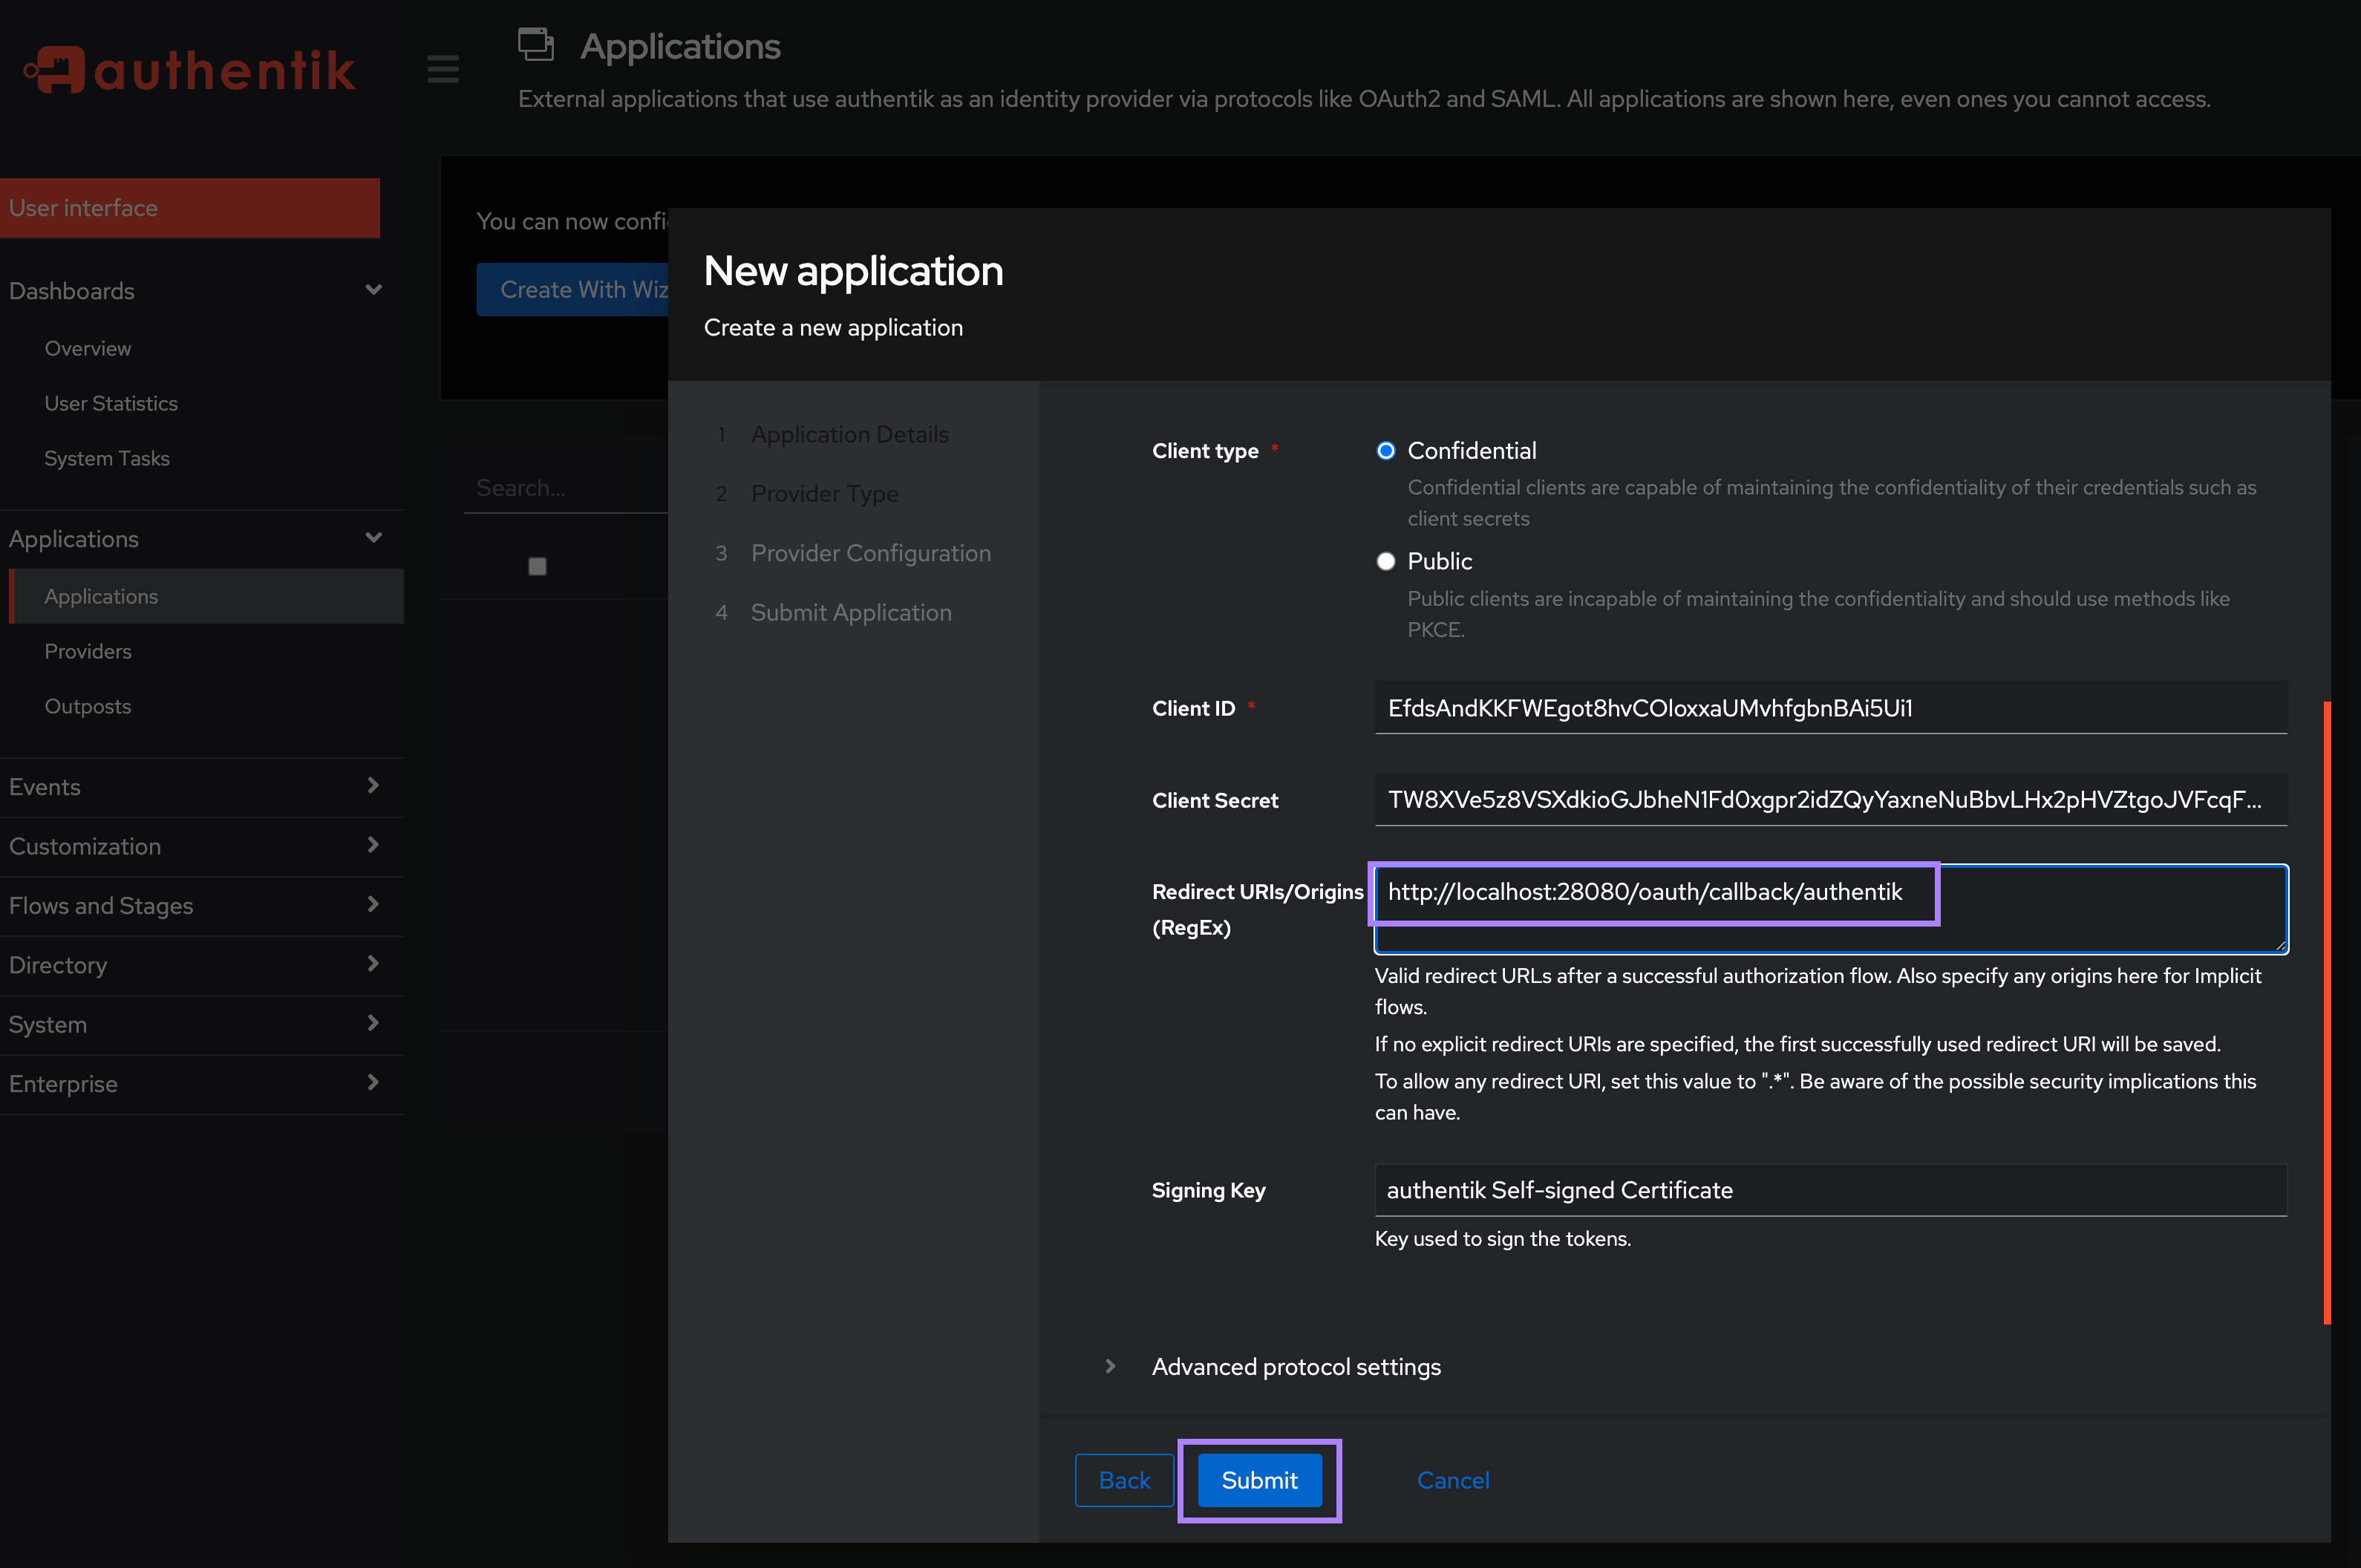
Note the Client ID and Client Secret as you will need these to configure Kestra in the next step.
Configure Authentik SSO in Kestra Settings
With the above Client ID and Secret, add the following in the micronaut configuration section:
        micronaut:
          security:
            oauth2:
              enabled: true
              clients:
                authentik:
                  client-id: "CLIENT_ID"
                  client-secret: "CLIENT_SECRET"
                  openid:
                    issuer: "http://localhost:9000/application/o/kestra/"
You may need to adjust the above issuer URL if you named your application something other than kestra. Make sure to update that URL to match your application name http://localhost:9000/application/o/<application_name>/.
Configure a Default Role for your SSO users in Kestra Settings
To ensure that your SSO users have some initial permissions within Kestra UI, it's useful to set up a default role for them. You can do this by adding the following configuration under the kestra.security section:
kestra:
  security:
    default-role:
      name: default_admin_role
      description: "Default Admin Role"
      permissions:
        NAMESPACE: ["CREATE", "READ", "UPDATE", "DELETE"]
        ROLE: ["CREATE", "READ", "UPDATE", "DELETE"]
        GROUP: ["CREATE", "READ", "UPDATE", "DELETE"]
        EXECUTION: ["CREATE", "READ", "UPDATE", "DELETE"]
        AUDITLOG: ["CREATE", "READ", "UPDATE", "DELETE"]
        USER: ["CREATE", "READ", "UPDATE", "DELETE"]
        BINDING: ["CREATE", "READ", "UPDATE", "DELETE"]
        FLOW: ["CREATE", "READ", "UPDATE", "DELETE"]
        SECRET: ["CREATE", "READ", "UPDATE", "DELETE"]
        BLUEPRINT: ["CREATE", "READ", "UPDATE", "DELETE"]
        INFRASTRUCTURE: ["CREATE", "READ", "UPDATE", "DELETE"]
        KVSTORE: ["CREATE", "READ", "UPDATE", "DELETE"]
  ee:
    tenants:
      enabled: true
      default-tenant: false
⚠️ Make sure that your default-role is added under the kestra.security section, not under micronaut.security. Also, ensure that the default-role has the necessary permissions for your users to interact with Kestra. The above configuration is just an example and you might want to restrict the permissions boundaries for production use.
authentik SCIM 2.0 Setup
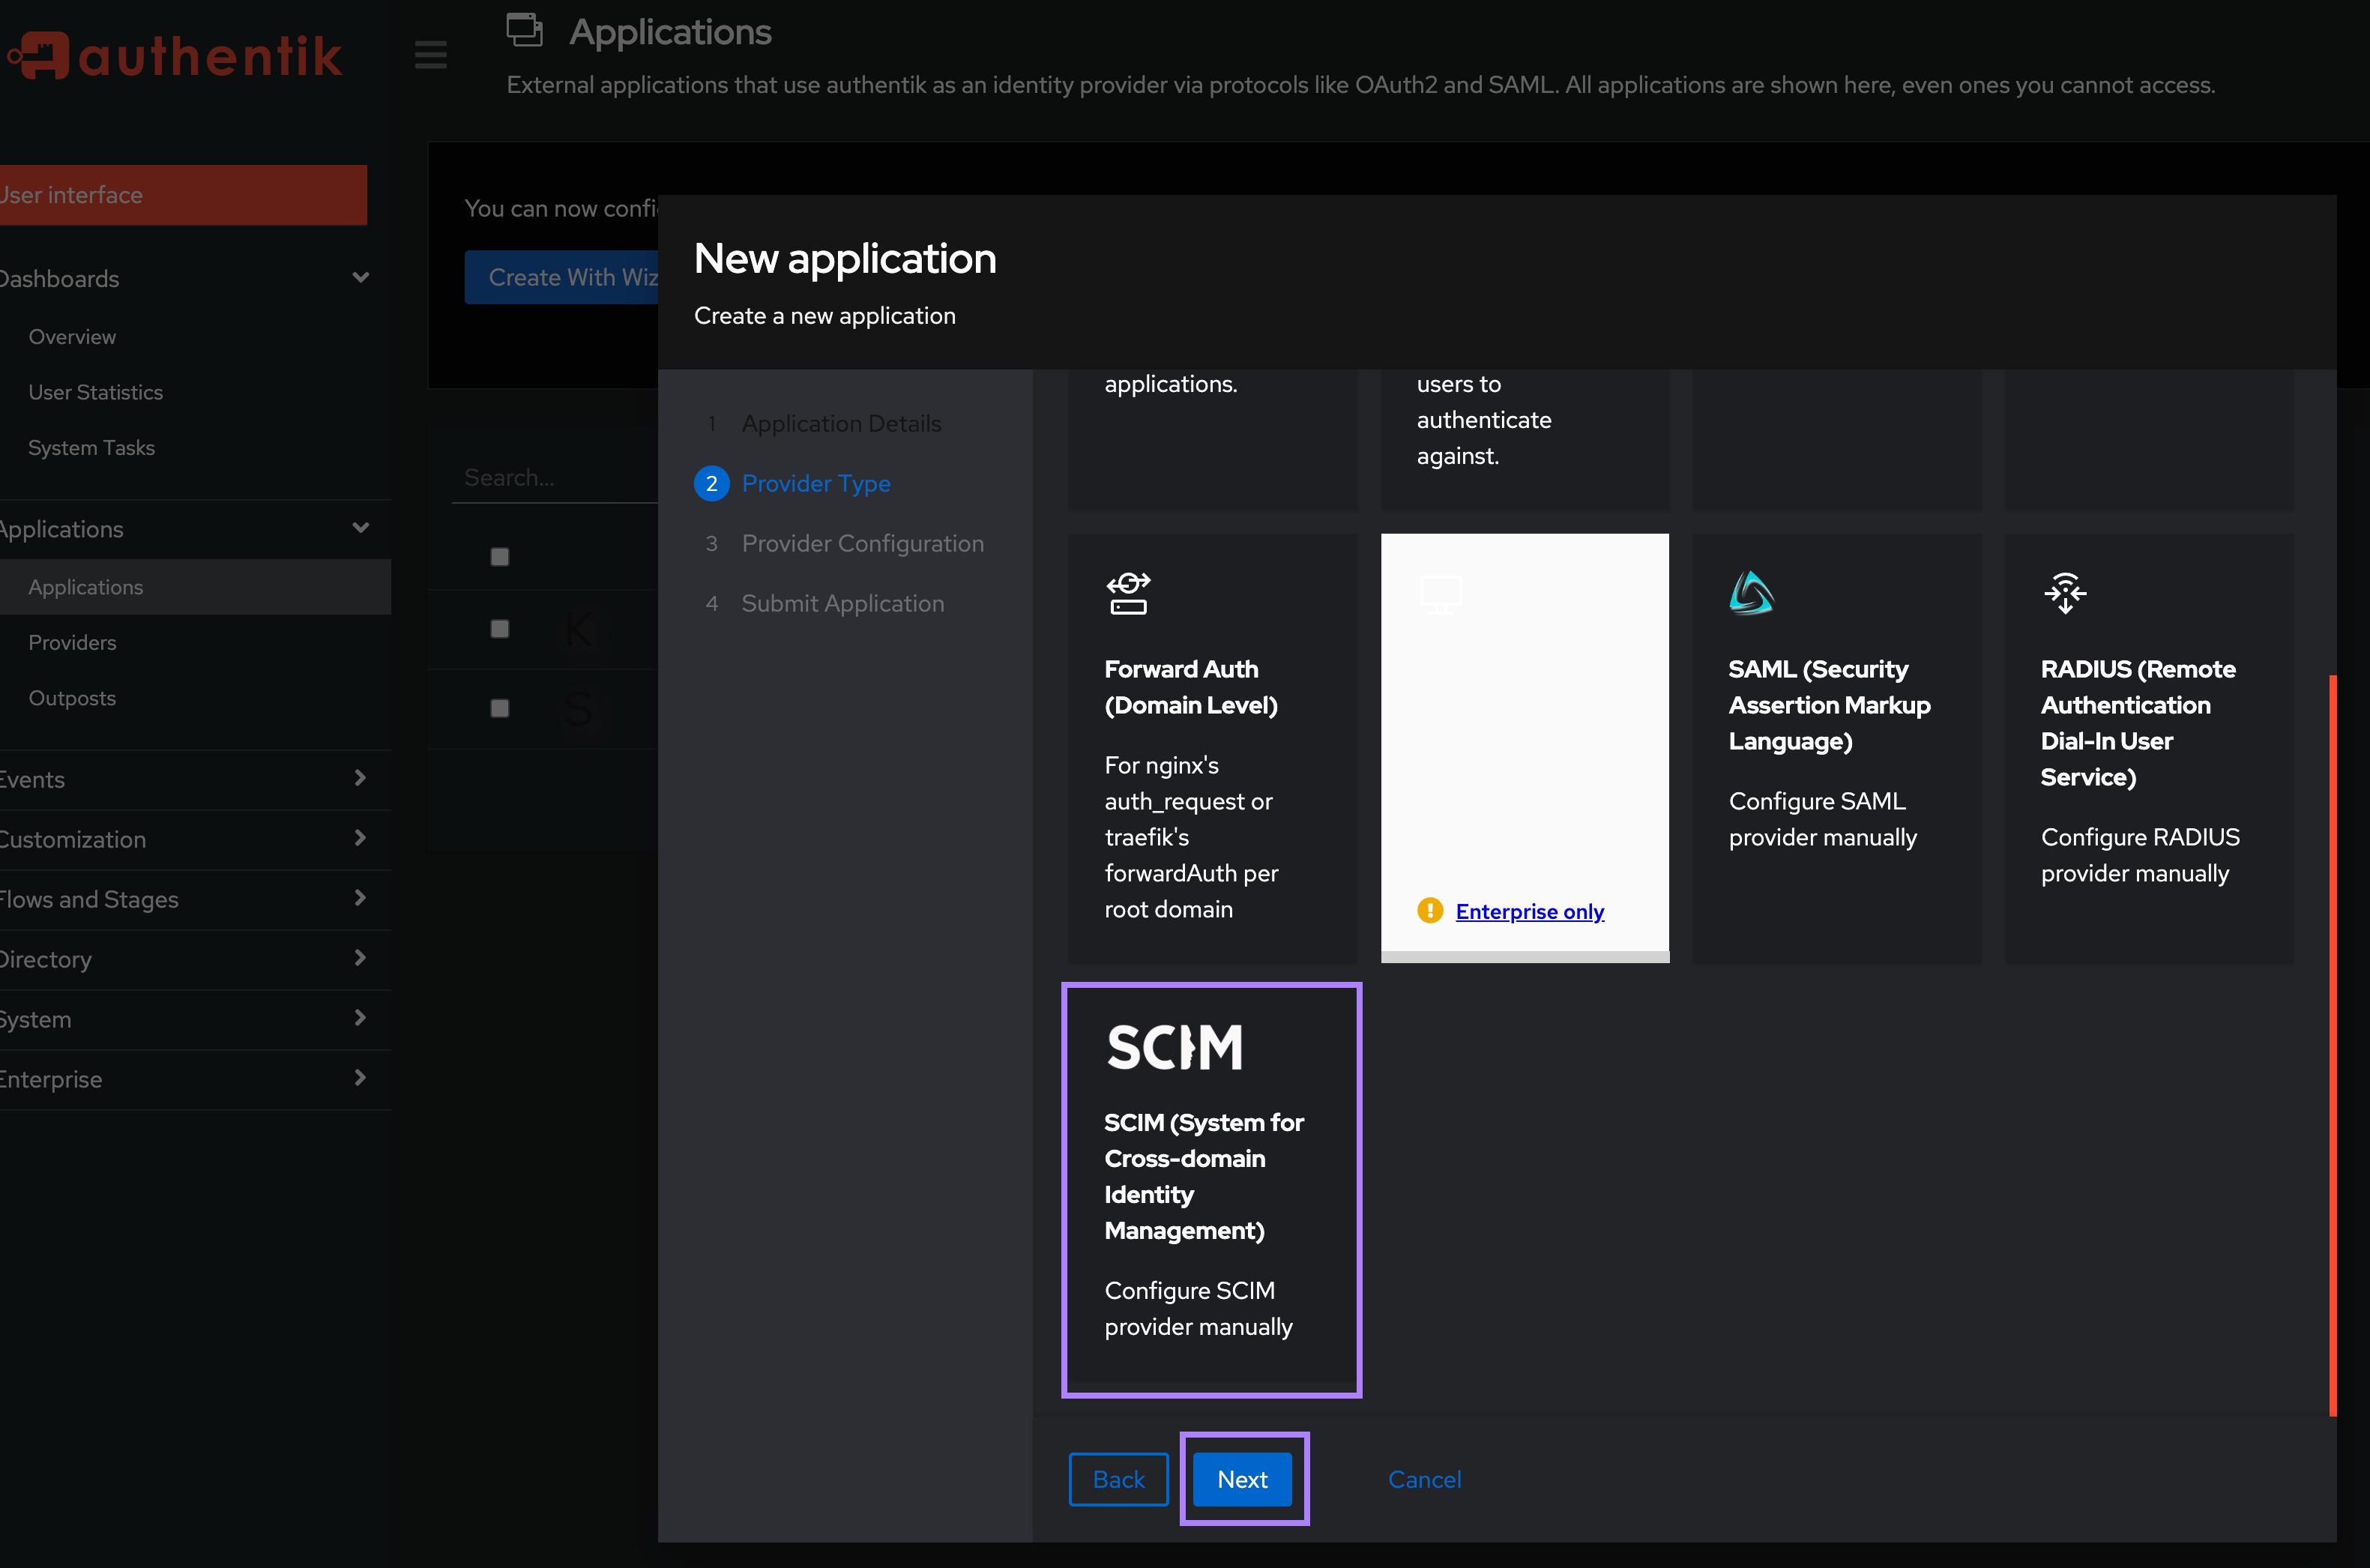
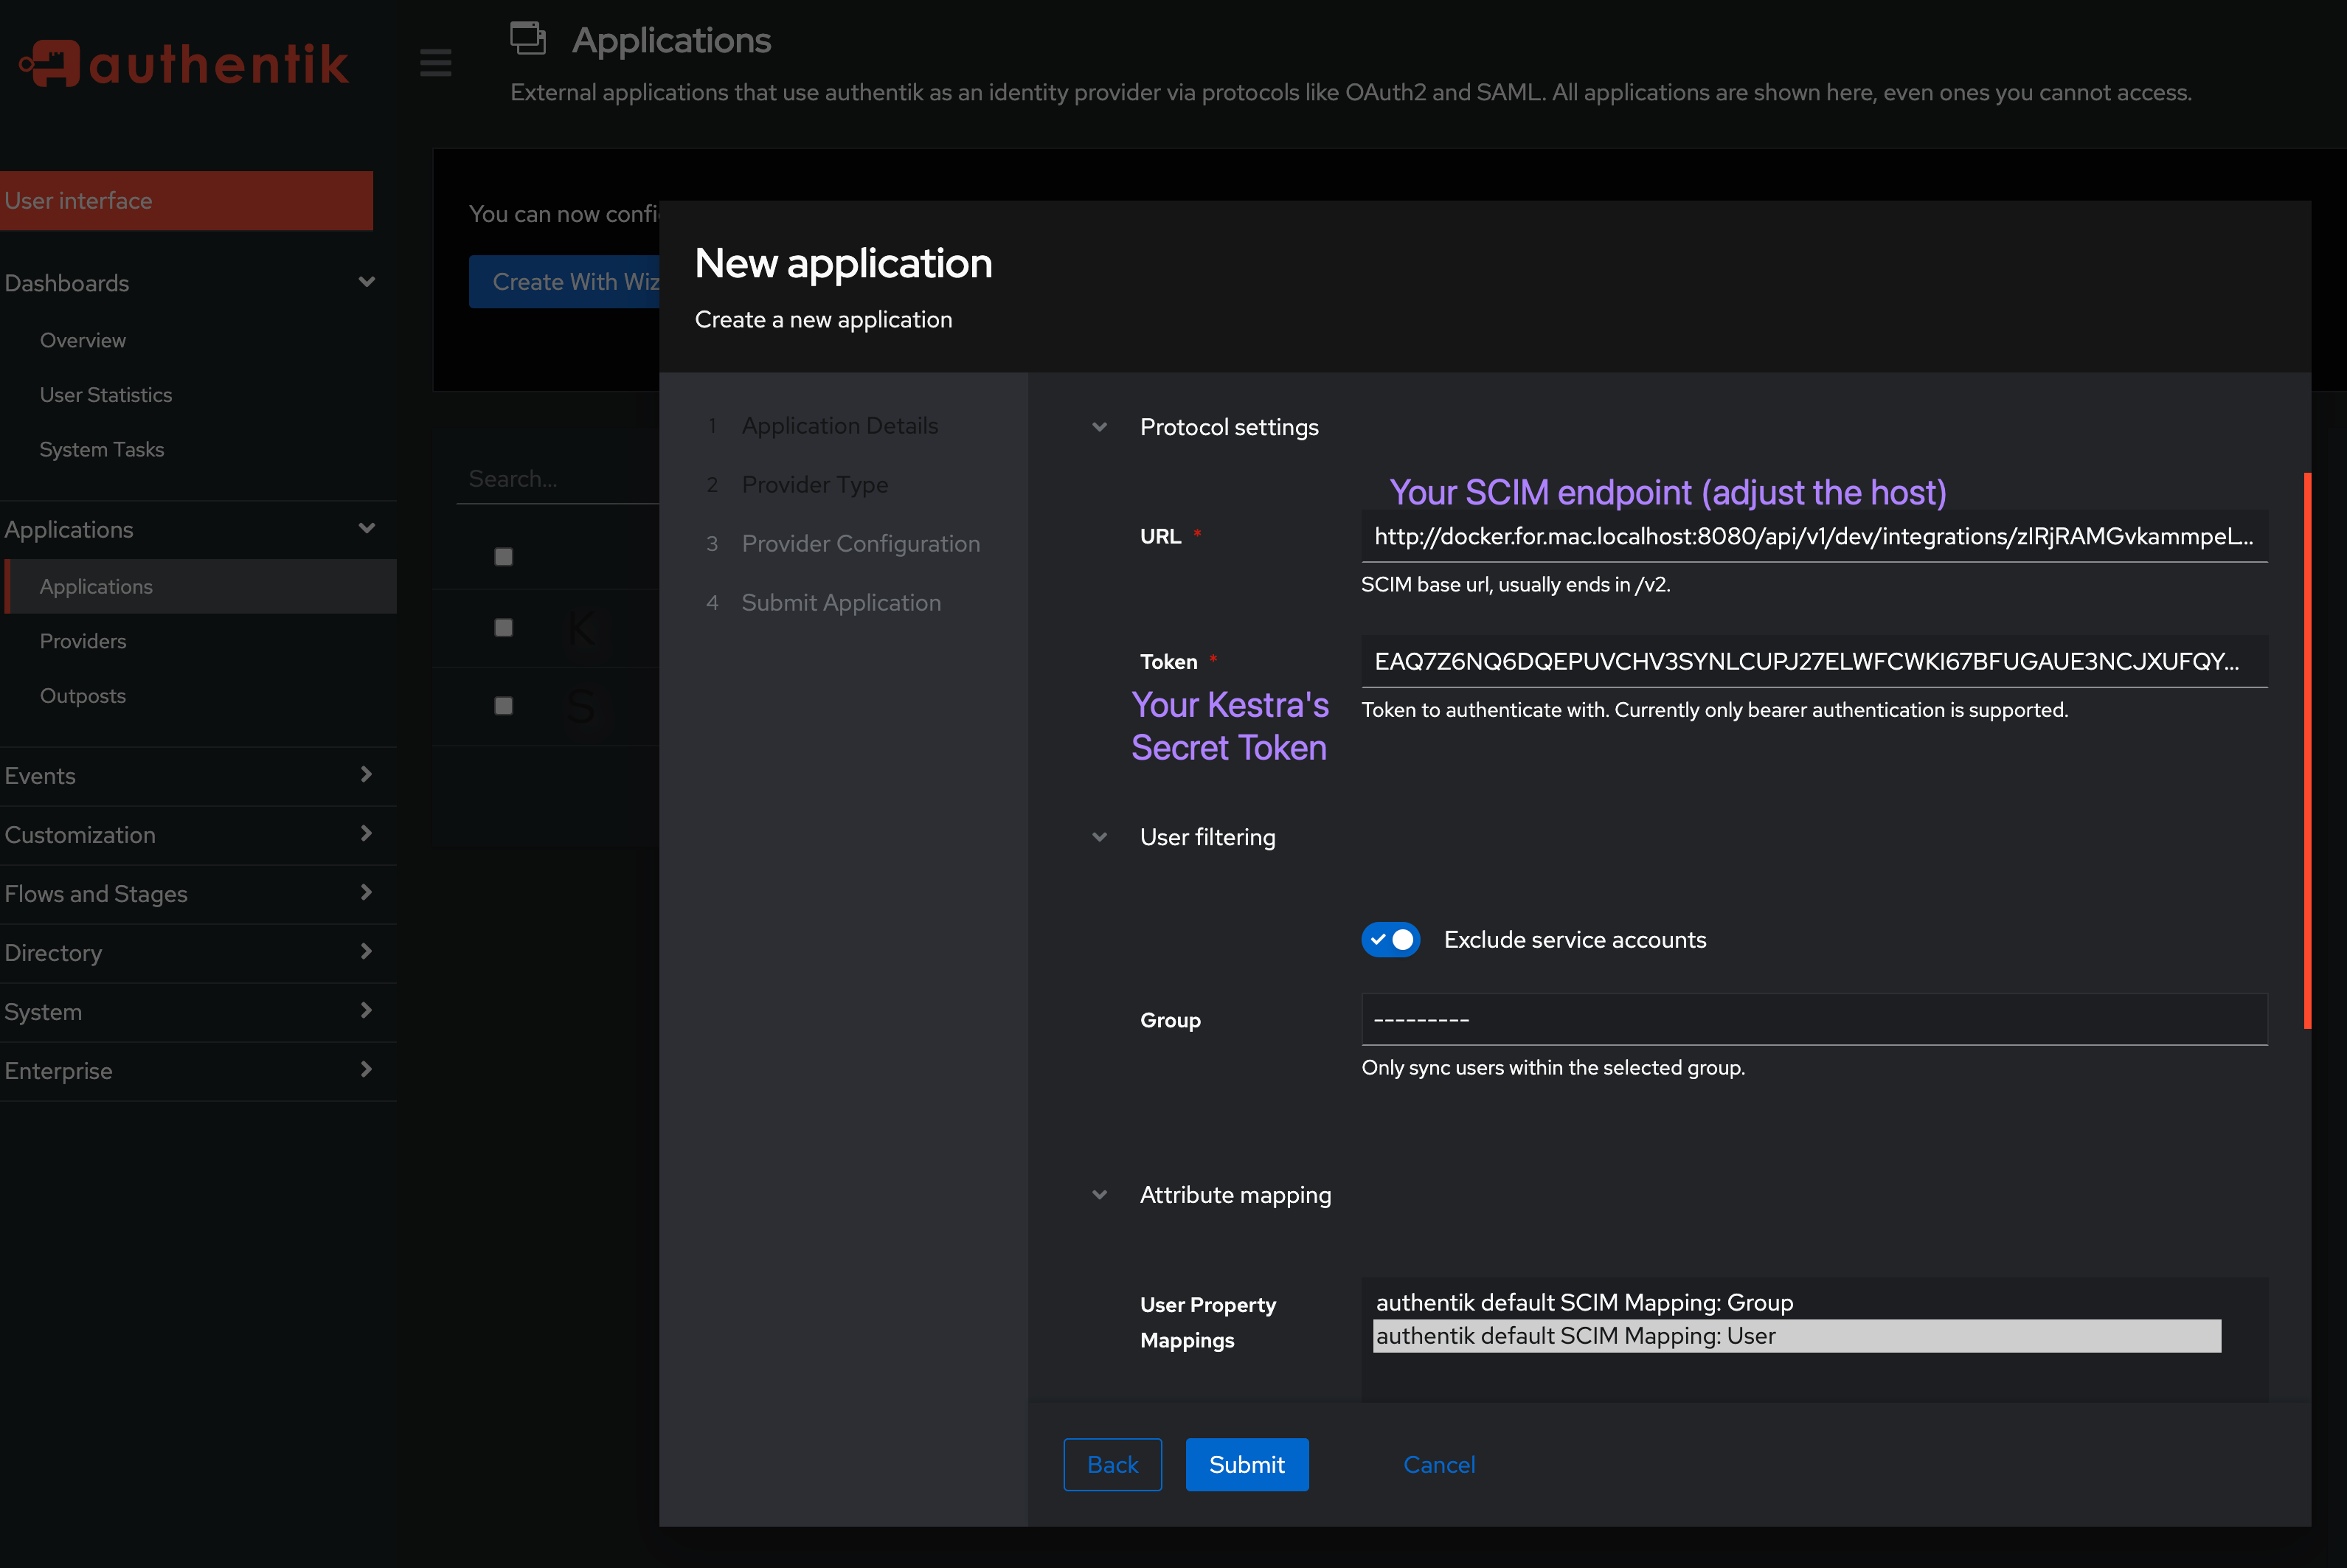
Configuring SCIM 2.0 requires a similar process to SSO — you'll need to create a new Application. Then, in the second step, select SCIM as the Provider Type.
In the Protocol settings section, enter the URL and Secret Token obtained from Kestra.
If you are running authentik on a Mac machine with docker-compose installer, make sure to replace localhost in your Kestra's SCIM endpoint with docker.for.mac.localhost since otherwise the sync won't work. Your URL should look as follows: http://docker.for.mac.localhost:8080/api/v1/dev/integrations/zIRjRAMGvkammpeLVuyJl/scim/v2.
Test both SSO and SCIM by adding users and groups
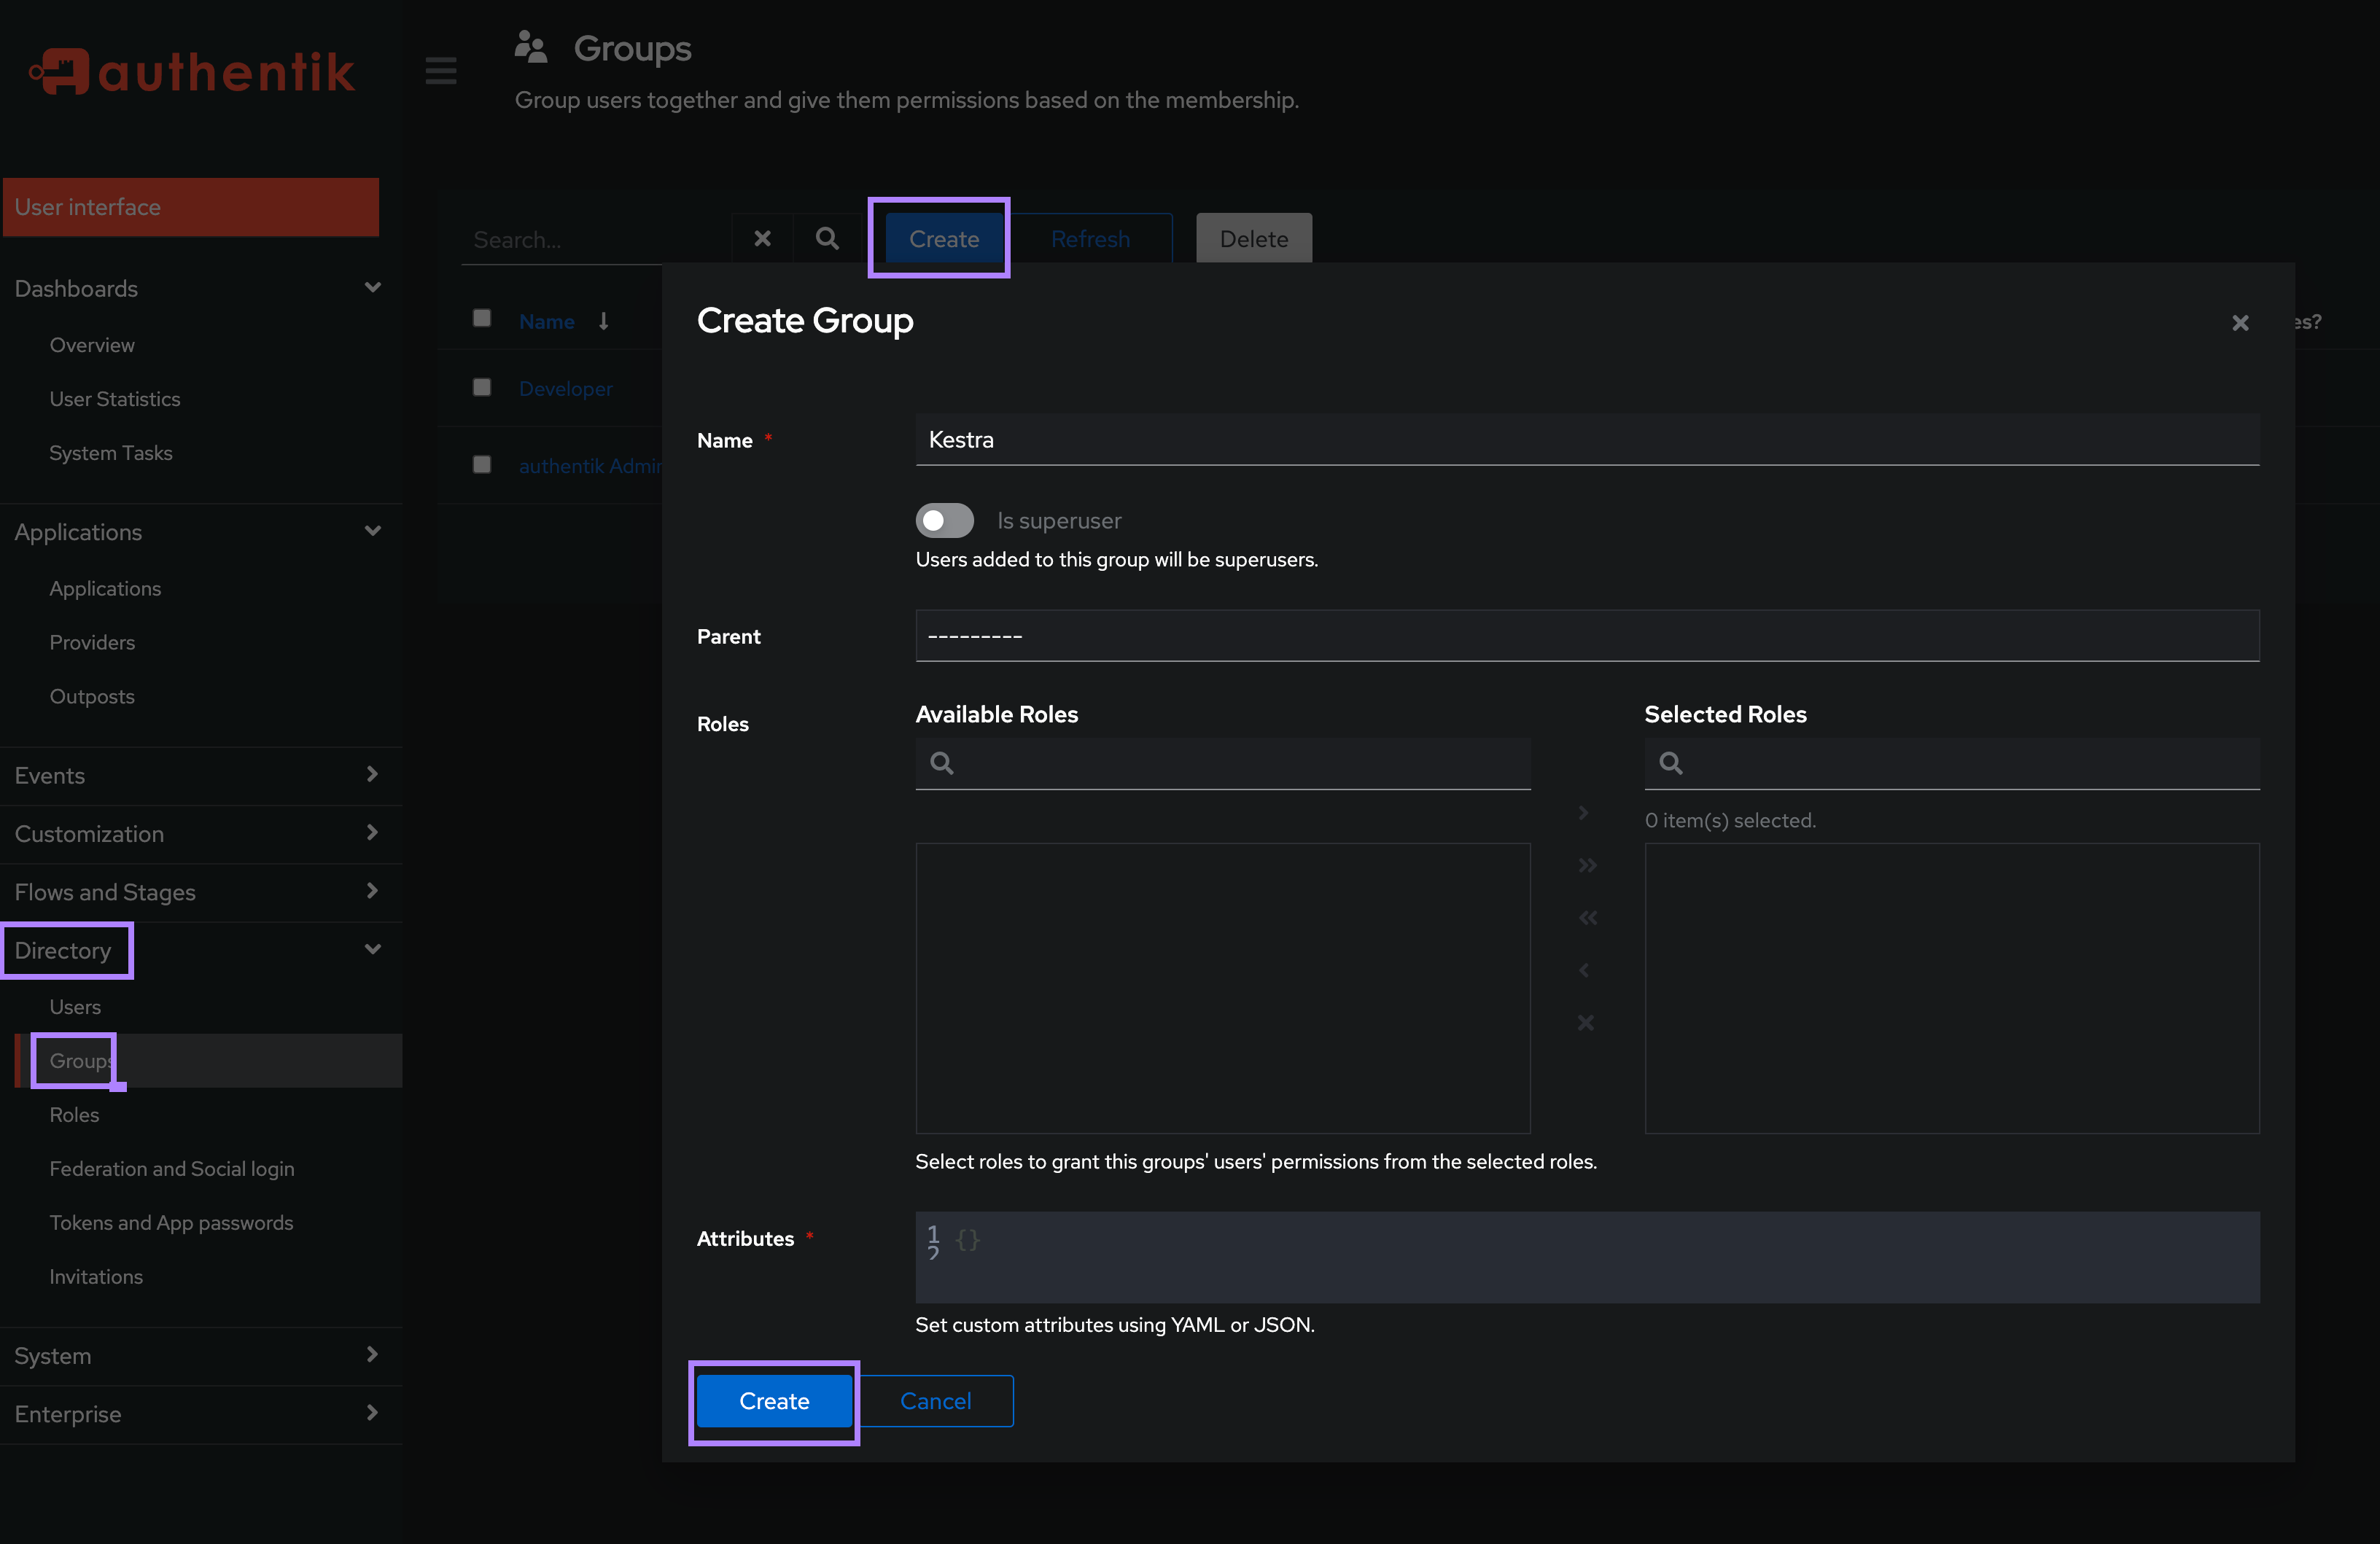
Create first Users and Groups in the Directory settings.
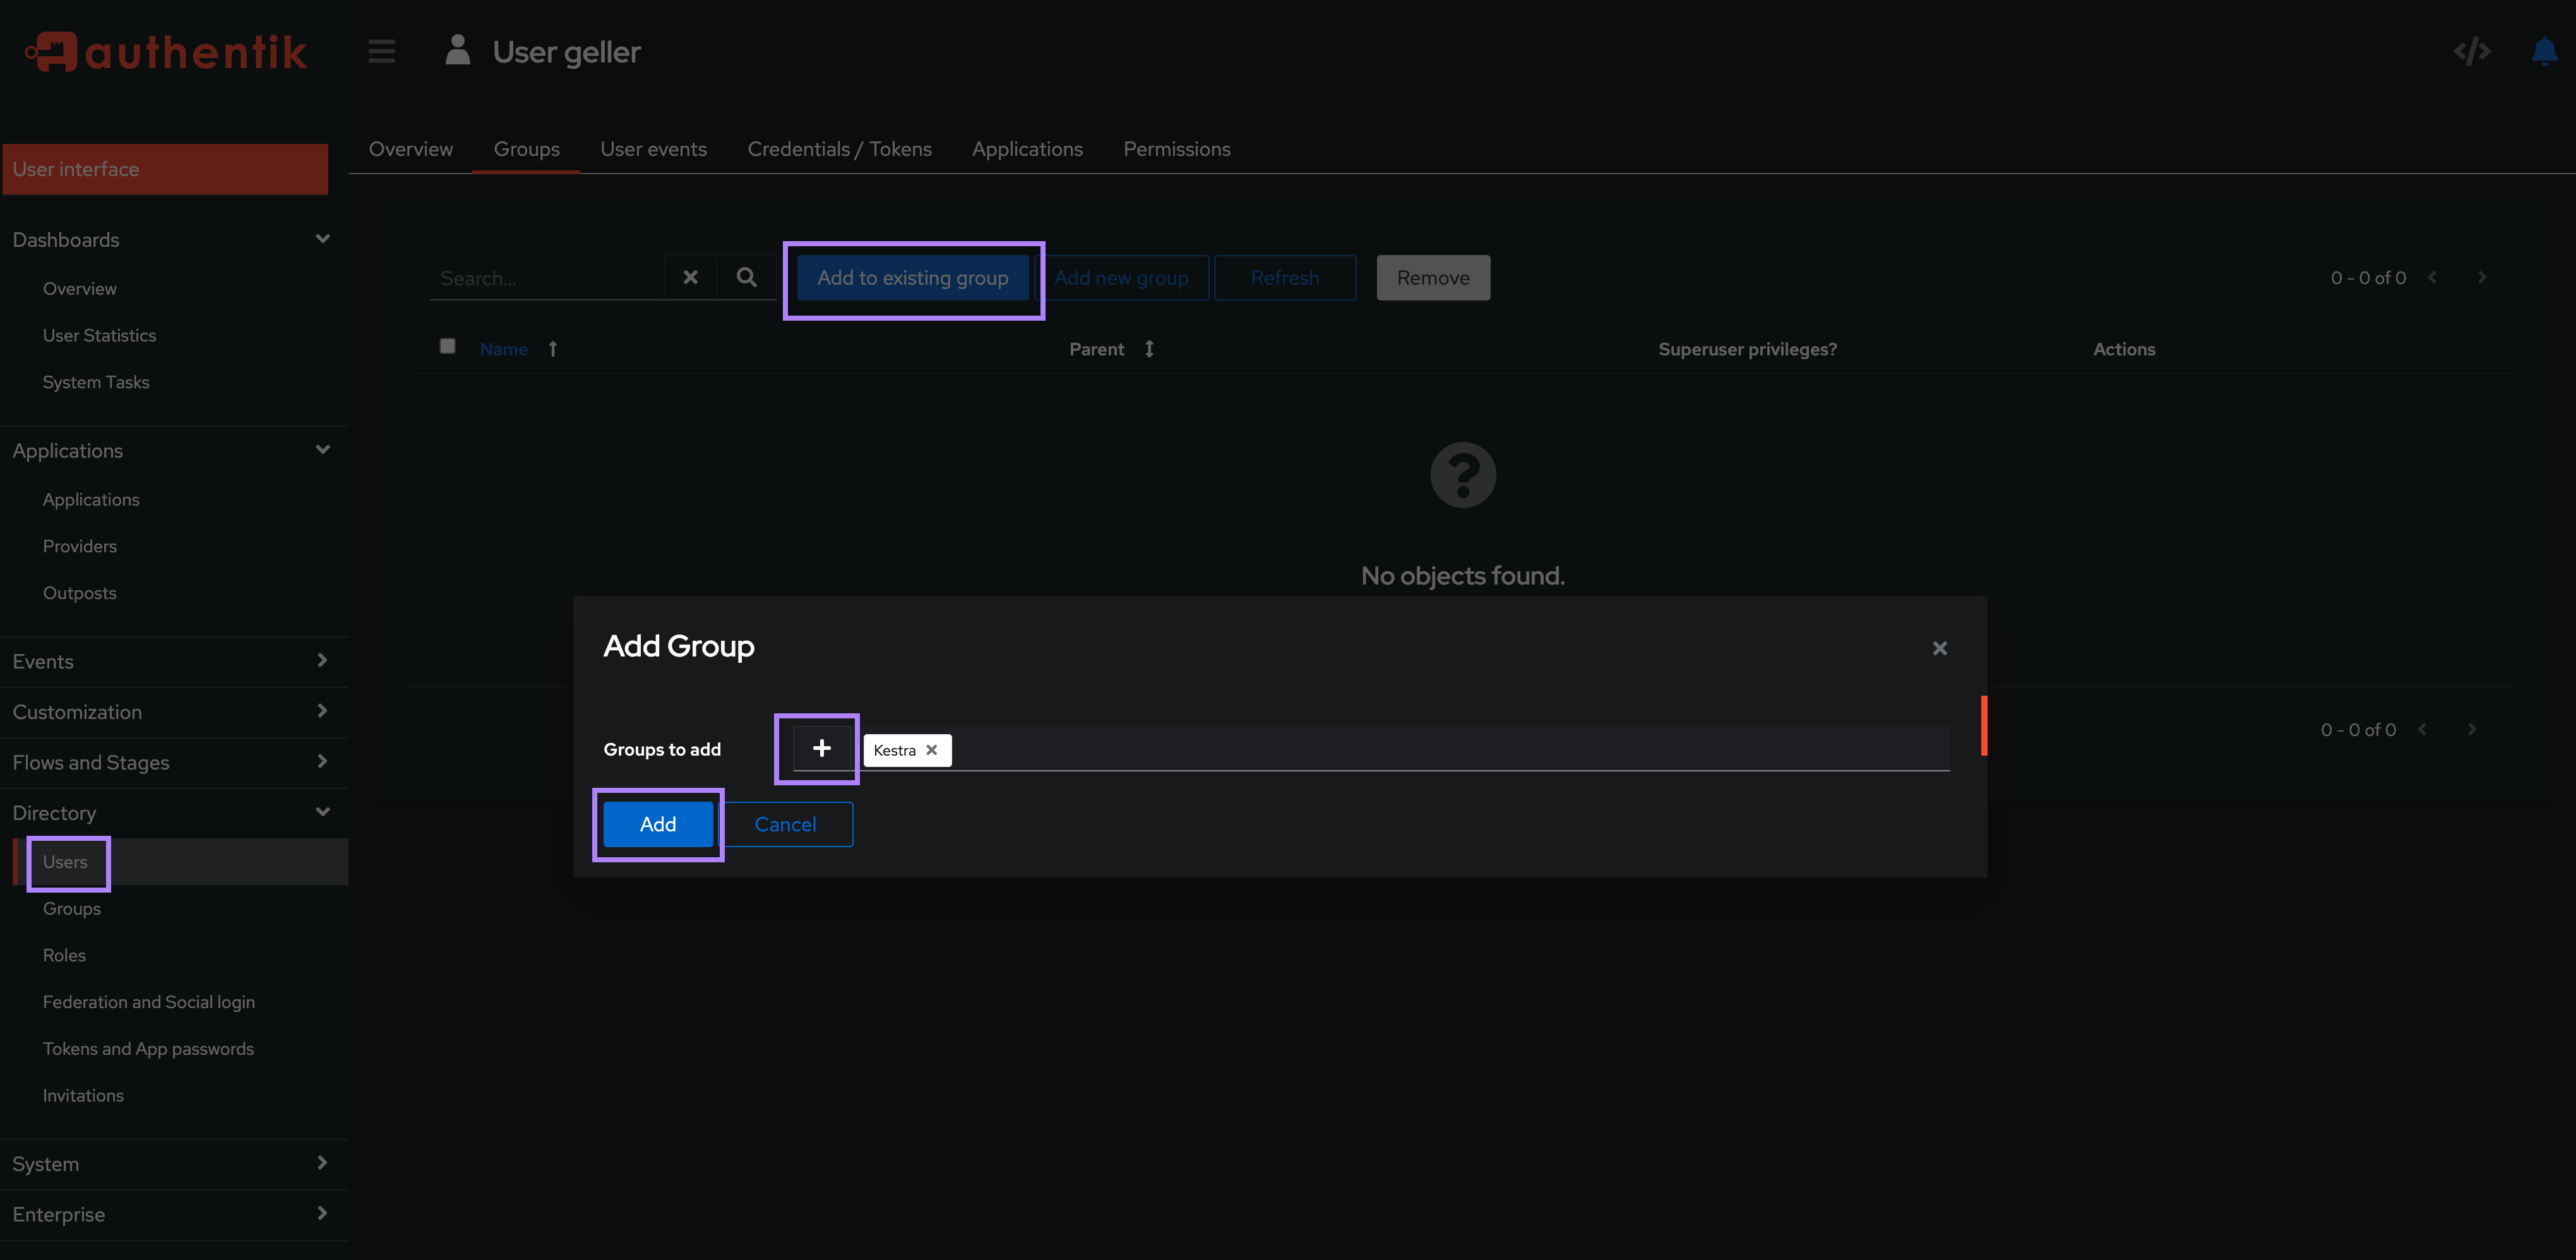
Then, assign your user(s) to an existing group:
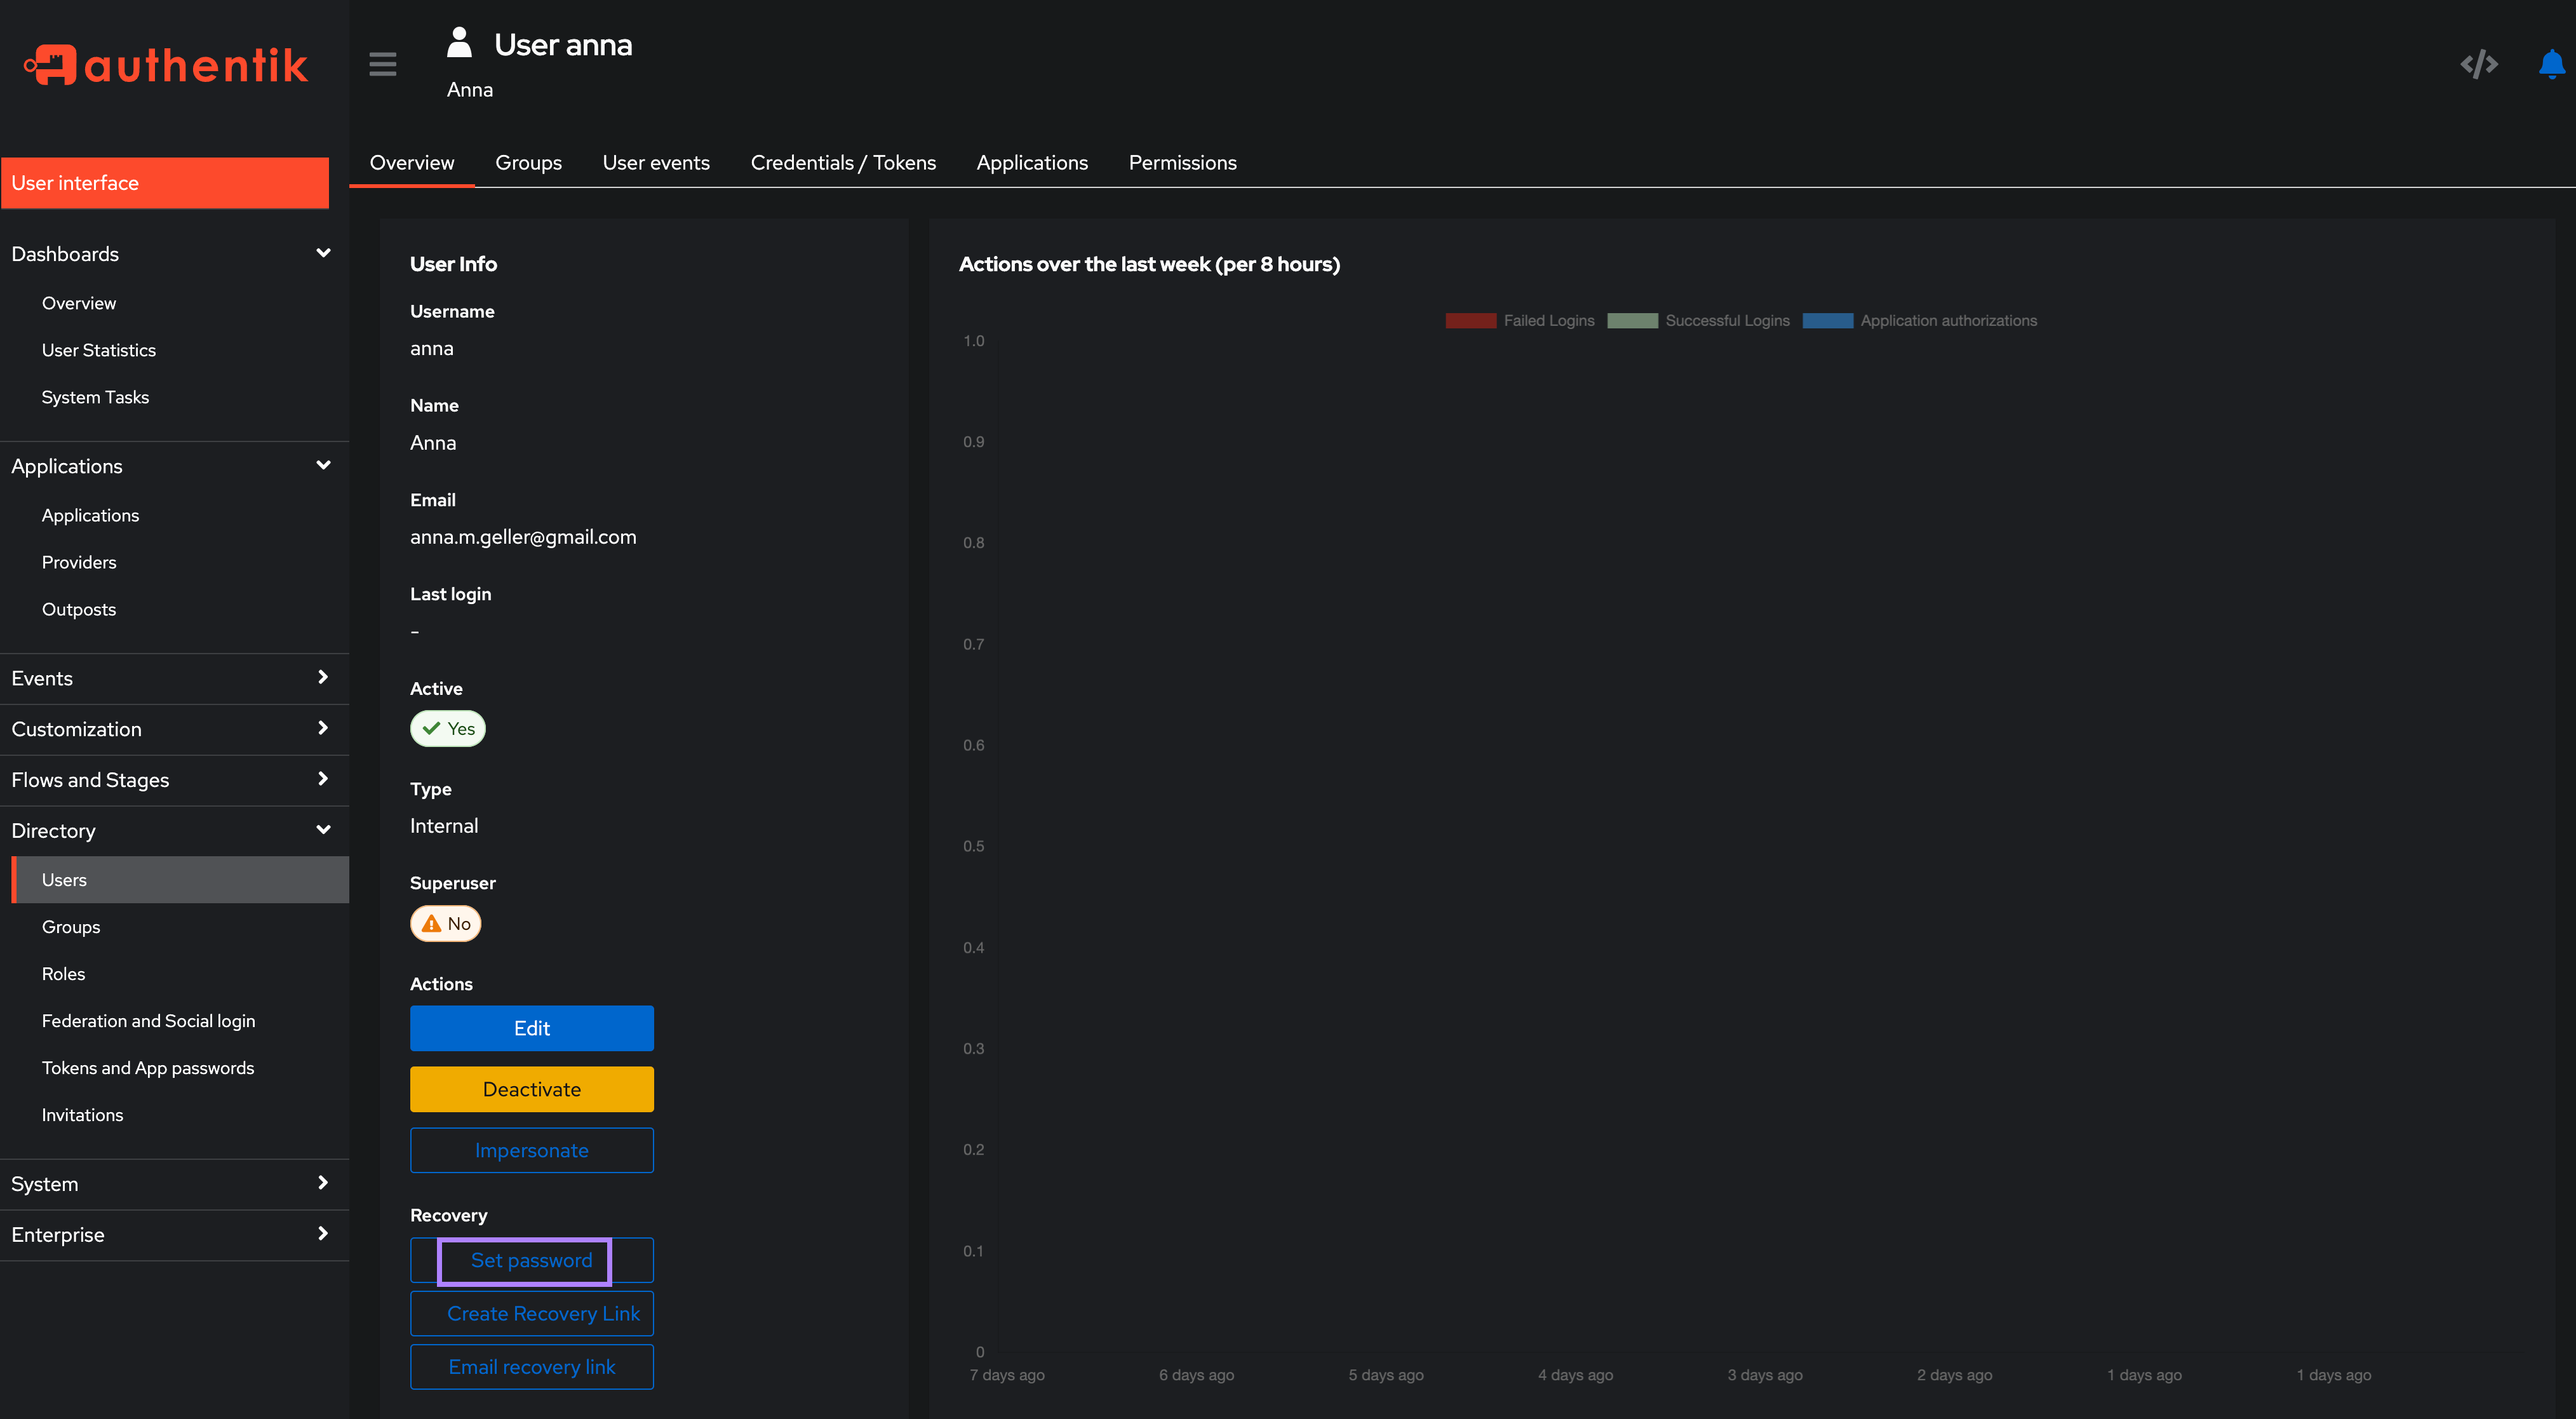
You can set password for each authentik user to allow them to log in directly to Kestra with their username/email and password.
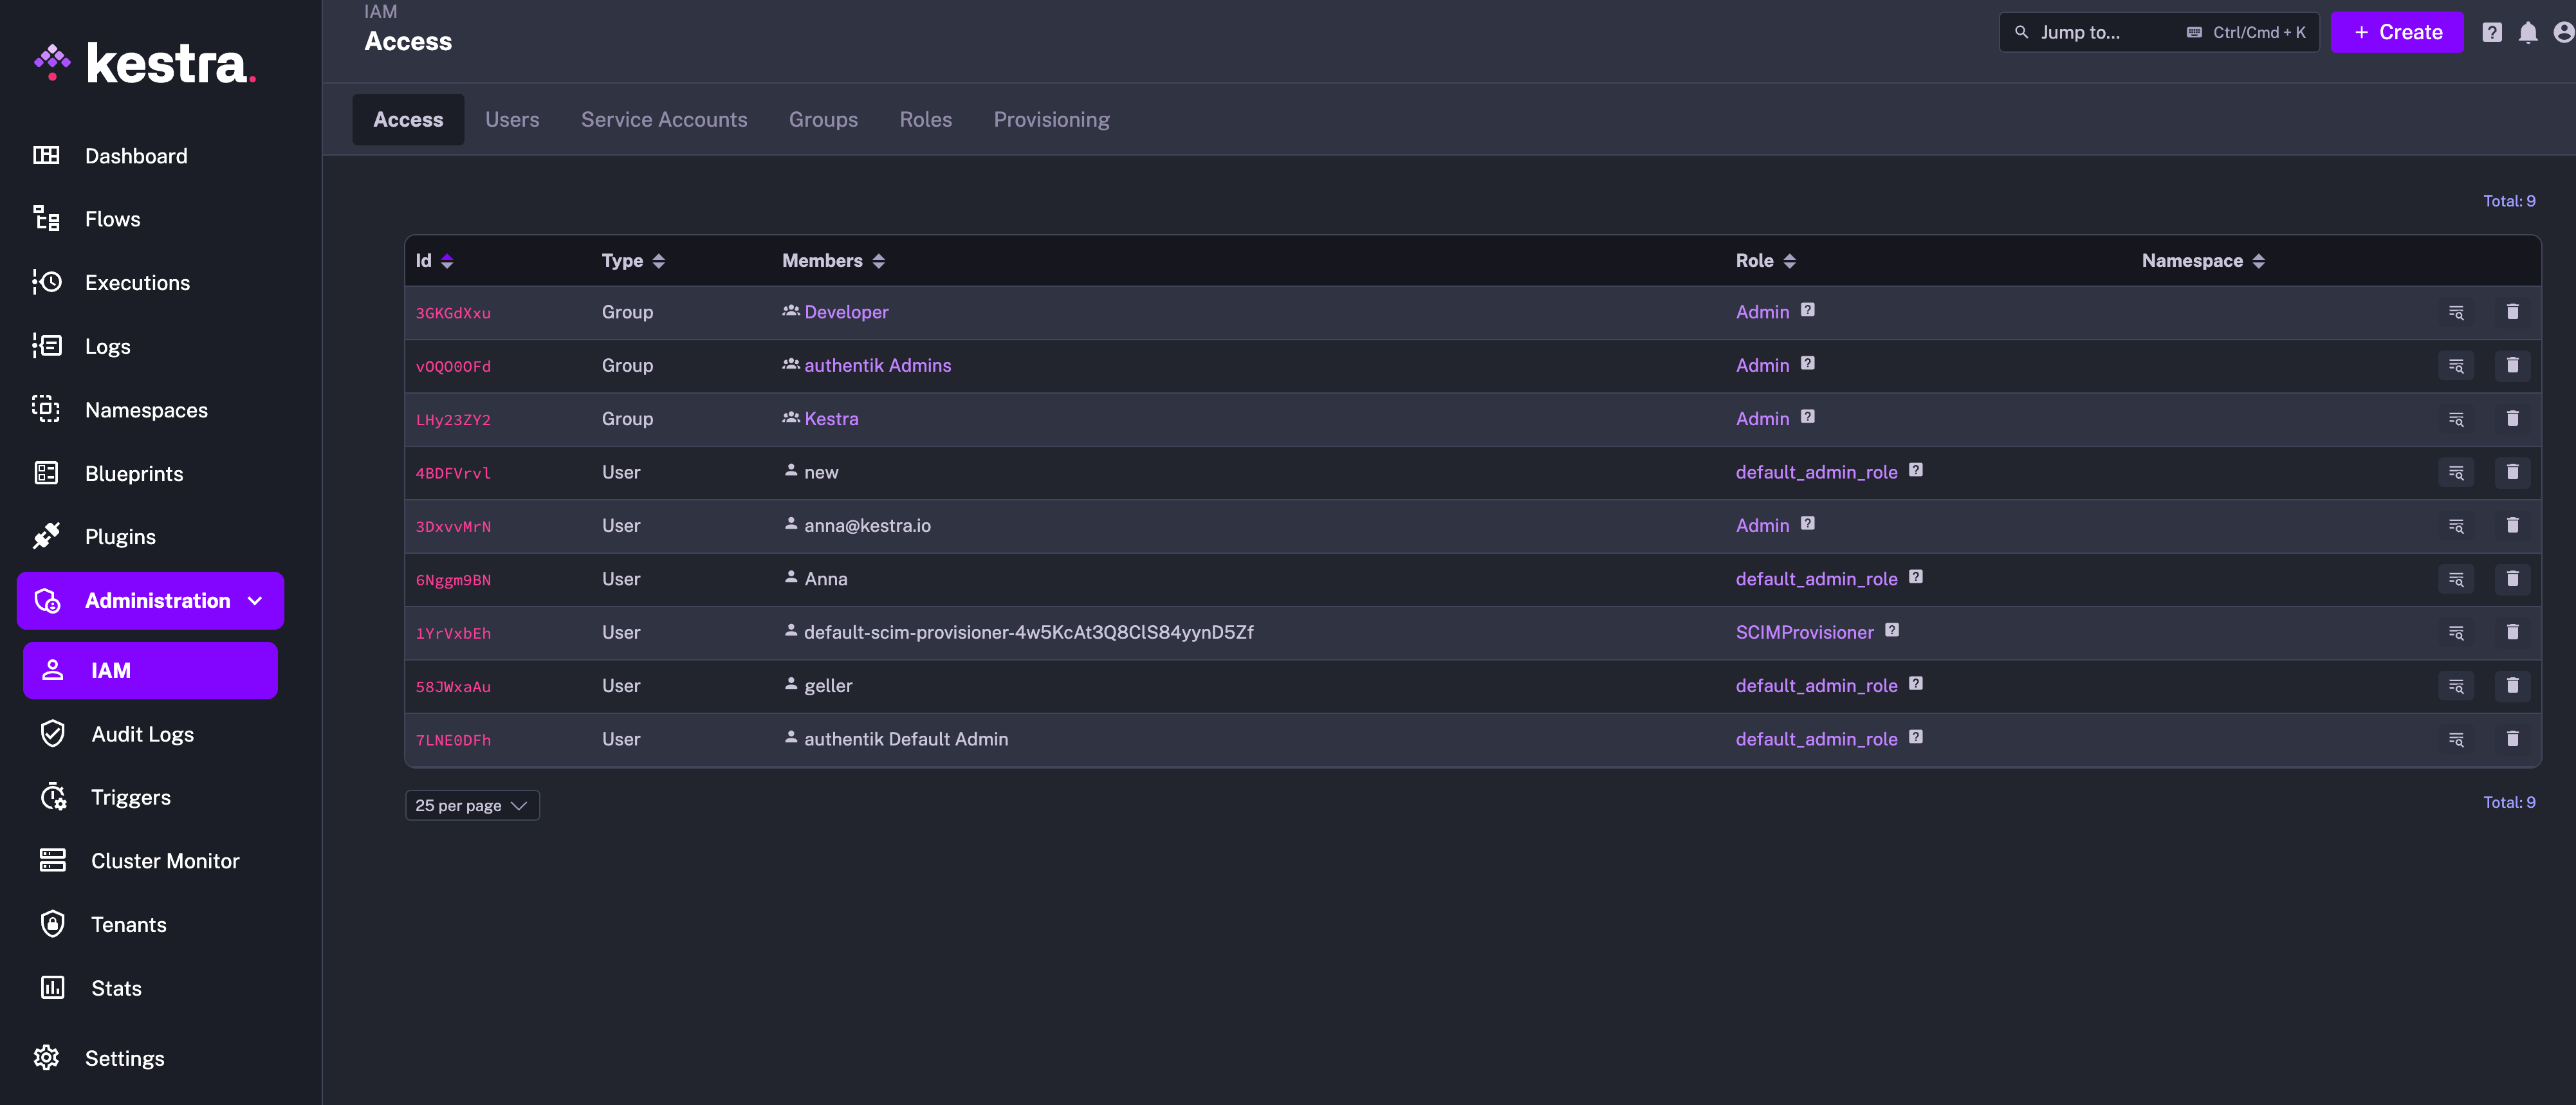
Once groups and users are created, they should be visible in the Kestra UI under the IAM → Users and Groups sections. It's best if you log in as the default admin user and attach a desired Role to each group to ensure that the users have the necessary permissions.
Then, to verify access, log in as one of those new authentik users in a separate browser or incognito mode and verify that the user has the permissions you expect.
Additional Resources
Was this page helpful?