 Namespace Management
Available on: Enterprise Edition
How to govern secrets, variables and plugin defaults on a namespace level.
Kestra is a multi-tenant platform. Each tenant can have multiple namespaces, and each namespace provides additional isolation and security.
Namespaces provide:
- a logical isolation of resources on top of the instance- or tenant-level isolation
- fine-grained access-control to secrets, variables and task configuration.
Namespaces are particularly useful in environments with many users, teams, projects and applications.
The benefits of namespace management
Even though namespace is a required property of each flow, namespaces are not created by default. To illustrate this, let's look at the following flow:
id: hello_world
namespace: company.marketing
tasks:
  - id: log_task
    type: io.kestra.plugin.core.log.Log
    message: hi from {{ flow.namespace }}
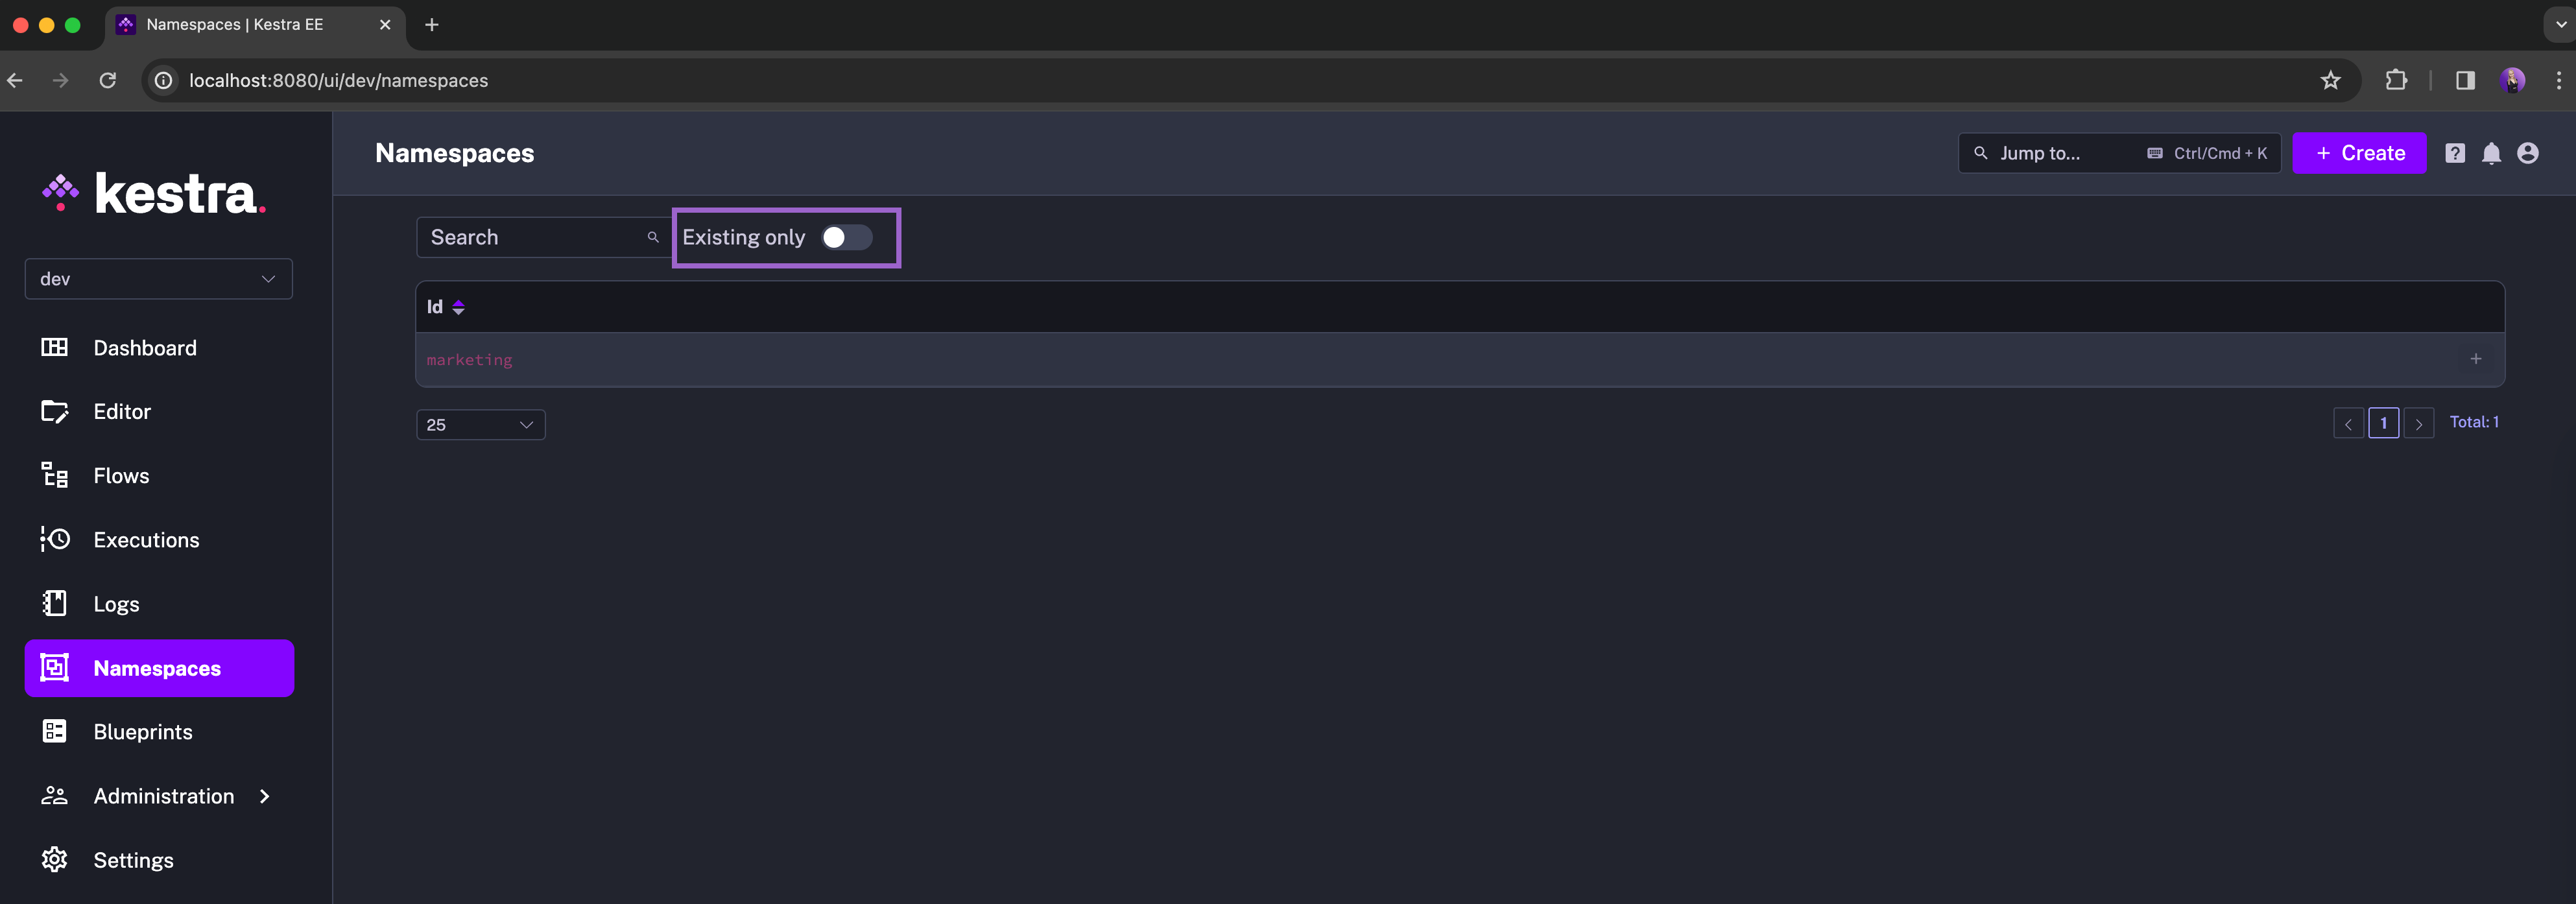
This flow is assigned to the company.marketing namespace. However, if you navigate to the Namespaces page in the UI, you'll notice that the namespace itself doesn't exist yet. The company.marketing namespace is greyed out because it's just a placeholder:

You can only filter for existing namespaces. Once you are ready to turn a placeholder namespace into a fully-fledged namespace, you create it in one click:

Namespace-level features: secrets, variables and plugin defaults
Once you create a namespace, you can centrally govern the following:
- namespace-level secrets
- namespace-level variables which values can be accessed through
{{ namespace.my_variable_name }} - namespace-level plugin defaults.
Since Kestra supports everything as code and from the UI, you can manage namespaces from the UI or programmatically (e.g. via our Terraform provider).
Creating a namespace from the UI
The video below shows how you can create a namespace from the Kestra UI. After creating a namespace, we're adding:
- several new secrets
- a nested namespace variable that references one of these secrets
- a list of plugin defaults helping to use those pre-configured secrets and variables in all the tasks from the AWS and Git plugins.
For detailed instructions, refer to centralized task configuration.
Creating a namespace from Terraform
Let's reproduce everything from the above video using Kestra's Terraform provider so that you know how to perform the same steps both from the UI and programmatically.
To create a namespace from Terraform, use the kestra_namespace resource.
First, configure your Terraform backend and add Kestra as a required provider:
terraform {
  backend "s3" {
    bucket = "kestraio"
    key    = "terraform.tfstate"
    region = "us-east-1"
  }
  required_providers {
    kestra = {
      source  = "kestra-io/kestra"
      version = "~>0.14"
    }
  }
}

provider "kestra" {
  url       = var.kestra_host
  username  = var.kestra_user
  password  = var.kestra_password
  tenant_id = var.kestra_tenant_id # only if you are using multi-tenancy
}
You can add a file main.tf to your Terraform project with the following content:
resource "kestra_namespace" "marketing" {
  namespace_id  = "marketing"
  description   = "Namespace for the marketing team"
}
The only required property is the namespace_id which is the name of the namespace. The description and all other properties are optional.
Adding Variables and Plugin Defaults to a Namespace Terraform resource
You can add variables and plugin defaults directly to the namespace resource by pointing to the YAML configuration files.
First, create the variables_marketing.yml file:
github:
  token: "{{ secret('GITHUB_TOKEN') }}"
Then, create another file for task_defaults_marketing.yml:
- type: io.kestra.plugin.aws
  values:
    accessKeyId: "{{ secret('AWS_ACCESS_KEY_ID') }}"
    region: us-east-1
    secretKeyId: "{{ secret('AWS_SECRET_ACCESS_KEY') }}"
- type: io.kestra.plugin.git
  values:
    password: "{{ render(namespace.github.token) }}"
    username: your-github-username
Finally, reference those files in your namespace resource definition:
resource "kestra_namespace" "marketing" {
  namespace_id  = "marketing"
  description   = "Namespace for the marketing team"
  variables     = file("variables_marketing.yml")
  task_defaults = file("task_defaults_marketing.yml")
}
Adding Secrets to a Namespace using Terraform
To programmatically add secrets to your namespace via Terraform, you can use the kestra_namespace_secret resource. Here is an example of adding multiple secrets to the marketing namespace:
resource "kestra_namespace_secret" "github_token" {
  namespace    = "marketing"
  secret_key   = "GITHUB_TOKEN"
  secret_value = var.github_token
}

resource "kestra_namespace_secret" "aws_access_key_id" {
  namespace    = "marketing"
  secret_key   = "AWS_ACCESS_KEY_ID"
  secret_value = var.aws_access_key_id
}

resource "kestra_namespace_secret" "aws_secret_access_key" {
  namespace    = "marketing"
  secret_key   = "AWS_SECRET_ACCESS_KEY"
  secret_value = var.aws_secret_access_key
}
Before referencing variables in your Terraform configuration, make sure to define them in your variables.tf file:
variable "github_token" {
  type = string
  sensitive = true
}

variable "aws_access_key_id" {
  type = string
  sensitive = true
}

variable "aws_secret_access_key" {
  type = string
  sensitive = true
}

variable "kestra_user" {
  type      = string
  sensitive = true
}

variable "kestra_password" {
  type      = string
  sensitive = true
}

variable "kestra_host" {
  type      = string
  sensitive = false
  default   = "https://us.kestra.cloud"
}

variable "kestra_tenant_id" {
  type      = string
  sensitive = false
  default   = "kestra-tech"
}
And add your secrets to the terraform.tfvars file:
github_token = "your-github-token"
aws_access_key_id = "your-aws-access-key-id"
aws_secret_access_key = "your-aws-secret-access-key"
kestra_user = "your-kestra-user"
kestra_password = "your-kestra-password"
Benefits of namespace-level secrets, variables and plugin defaults
Namespace management functionality offers Enterprise-grade security and governance to your Kestra instance. It allows your organization to centrally manage your secrets, variables and task configuration while providing fine-grained access-control to those resources.
Was this page helpful?